
- Make sure glue marks and targets match size and shape, and that doubled up edges are aligned before drying.
- Glue pieces 47 & 48 together first and let dry.
- Tabs on the edge of piece 48 will only fit into the front side of slots in piece 46 in one way.
- This will make a BEAM piece.

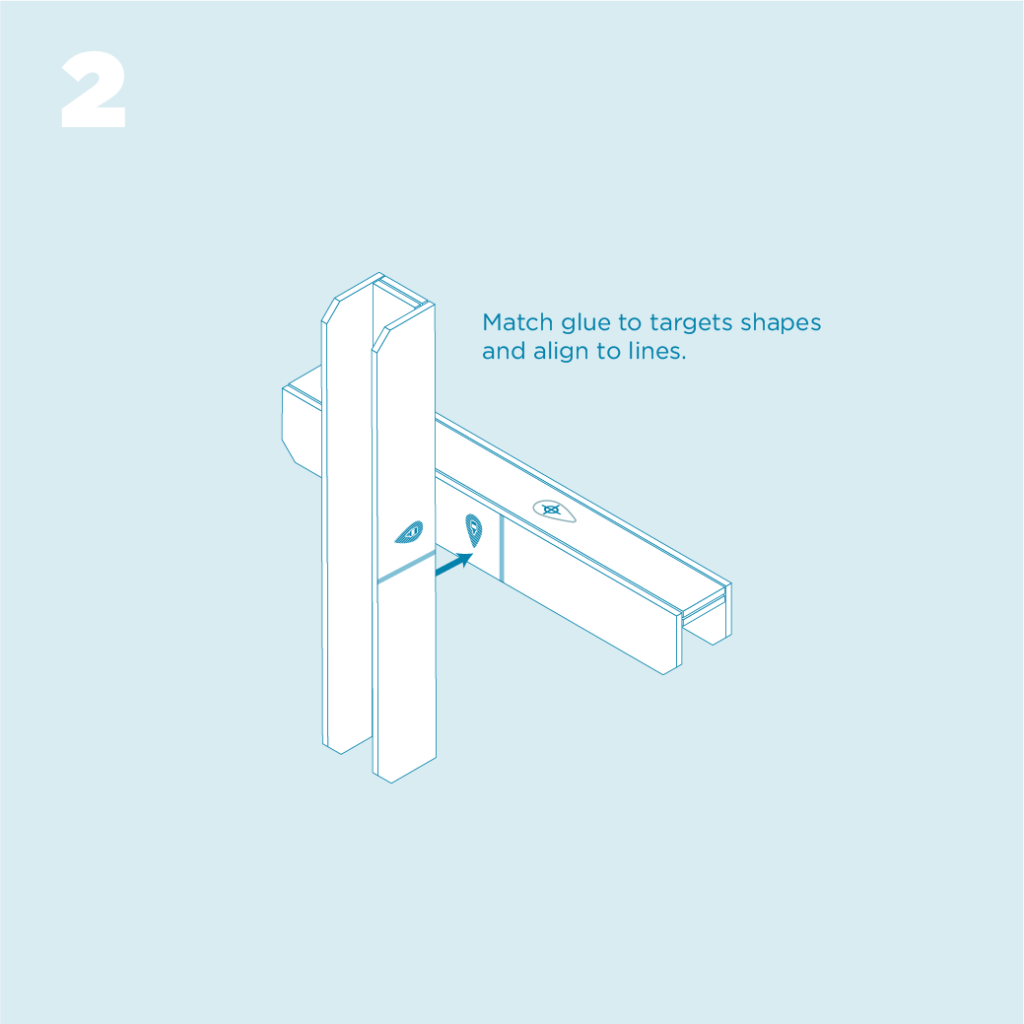
- When gluing two assembled BEAM pieces together make sure the tear drop shaped glue marks and targets align.
- Also ensure that the indicator line adjacent to the glue mark on piece 46 is lined up with the edge of the other assembled BEAM piece.
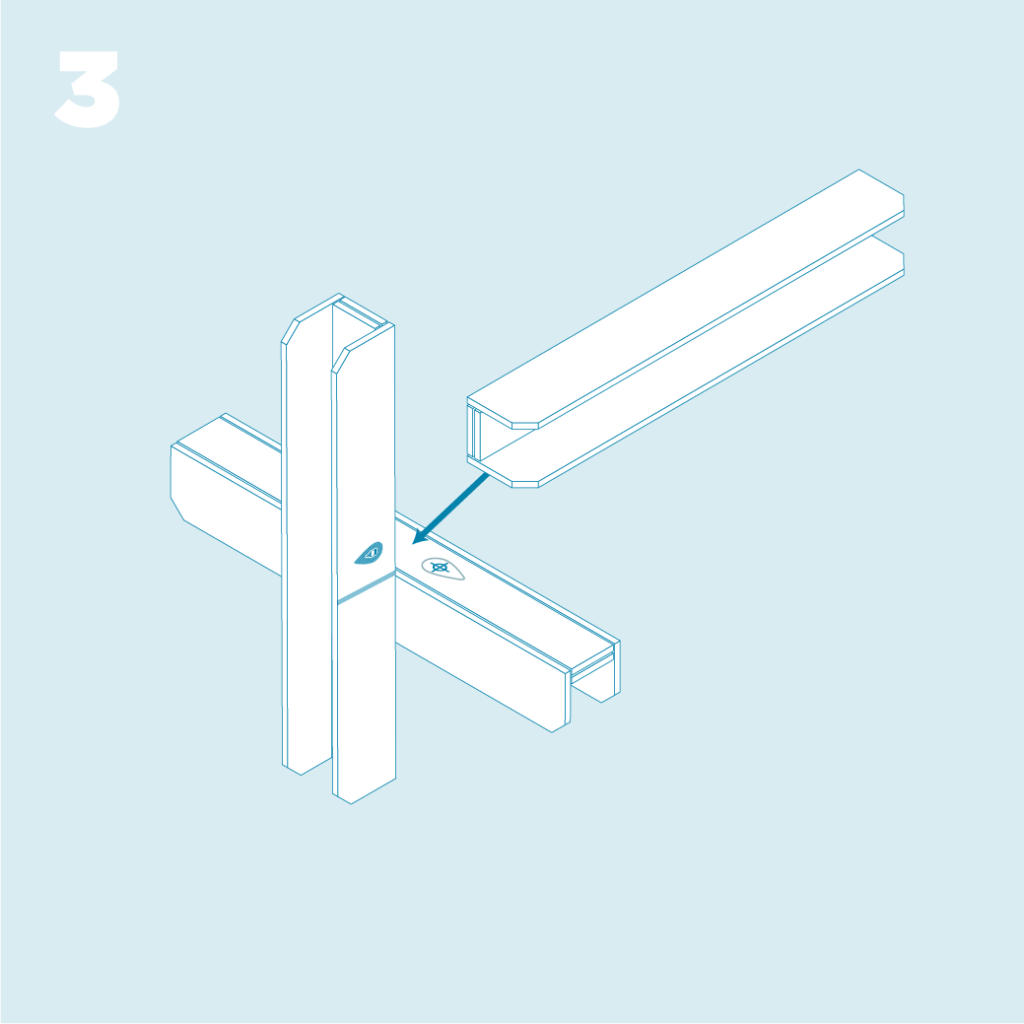
- Glue and assemble as indicated.

- The finished piece should look like so.

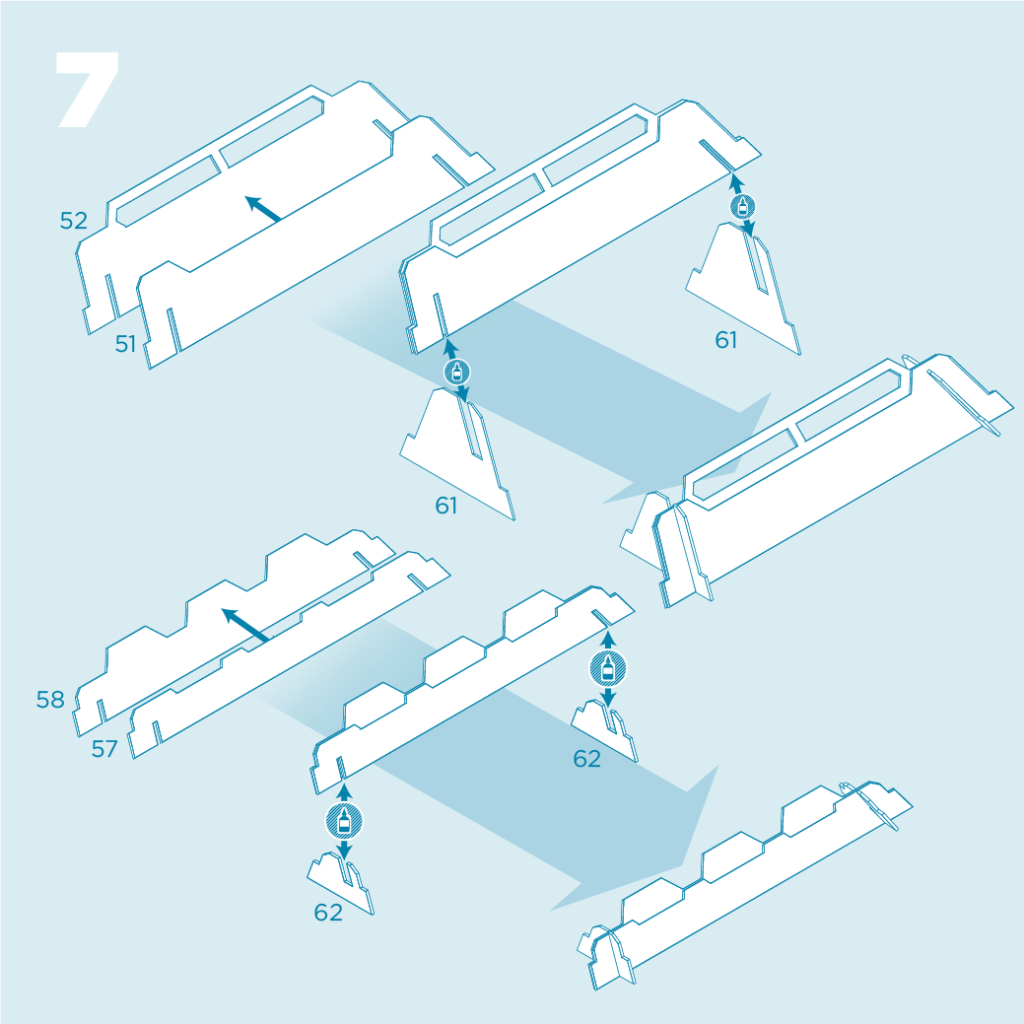
- When assembling cover pieces put glue dots in the end of the slots on the large face pieces before sliding on the leg support pieces.
- Then before the glue dries, make sure the leg support pieces are perpendicular to the large face pieces.

- When assembling cover pieces putting glue dots in the inside of the slots in the large face pieces before sliding on the leg support pieces.
- Then before the glue dries, make sure the leg support pieces are perpendicular to the large face pieces.
- When assembling cover pieces putting glue dots in the inside of the slots in the large face pieces before sliding on the leg support pieces.
- Then before the glue dries, make sure the leg support pieces are perpendicular to the large face pieces.
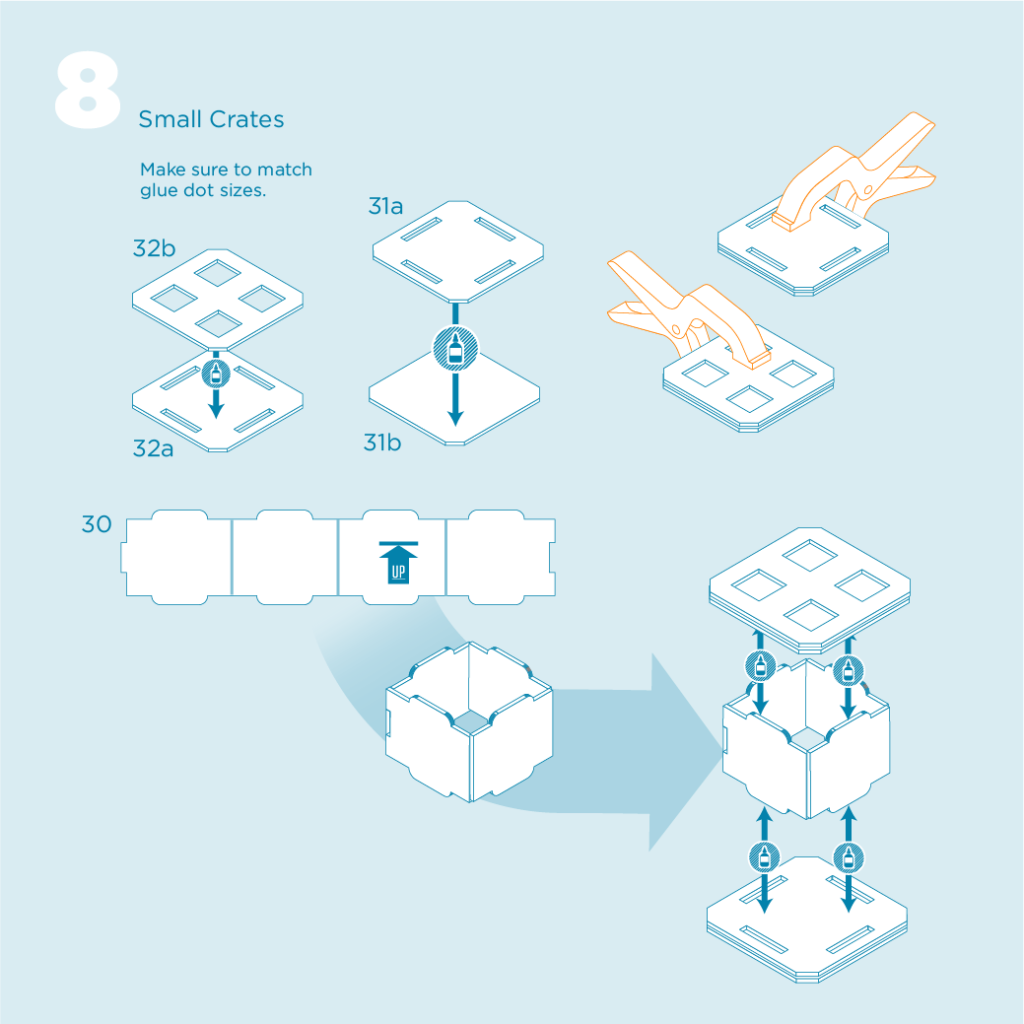
- Before assembling, make sure all crate pieces are the same color. Some pieces are only colored on one side.
- Make sure glue marks and targets match size and shape, and that doubled up edges are aligned before drying.
- Glue pieces 31a & 31b as well as 32a & 32b together first and let dry.
- On piece 30 ensure all scores are crisply and evenly folded.