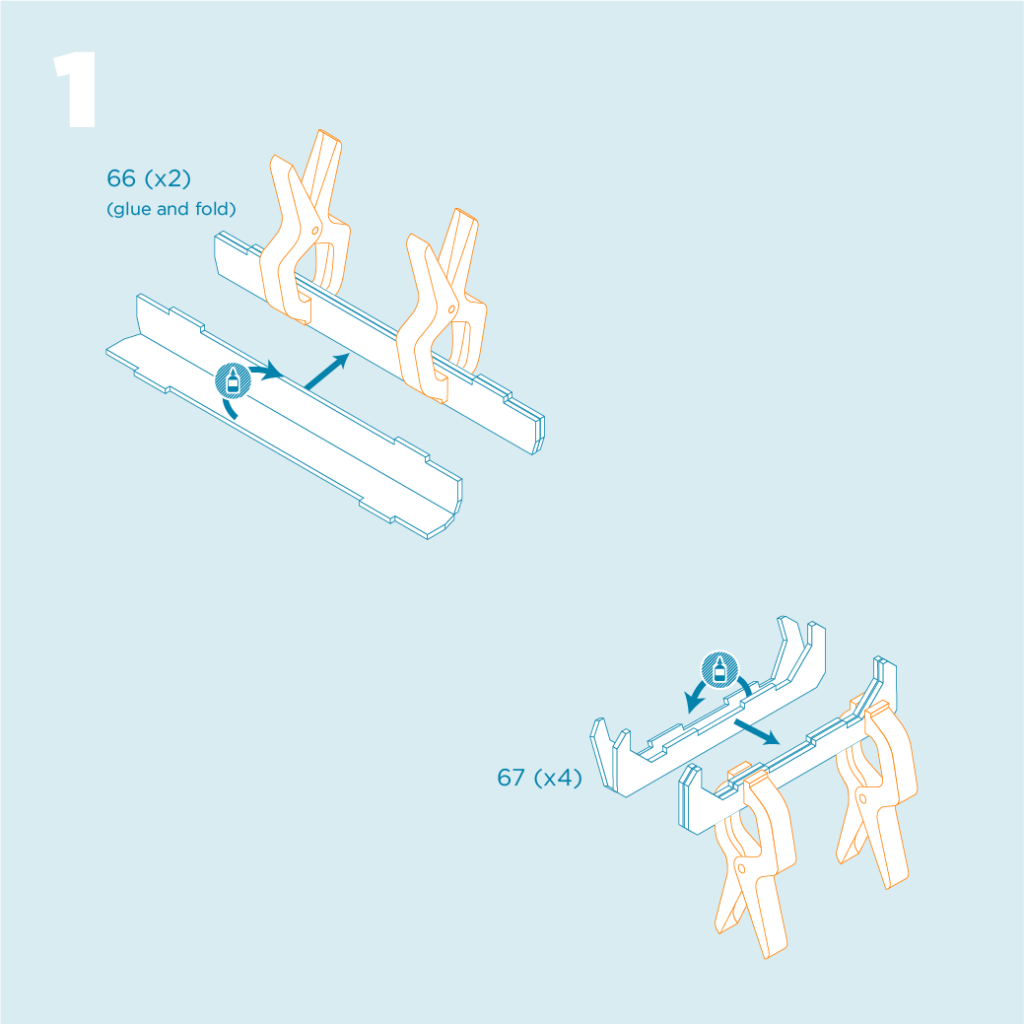
- On pieces 66 & 67 ensure all scores are crisply and evenly folded.
- Then glue, clamp, and let dry.
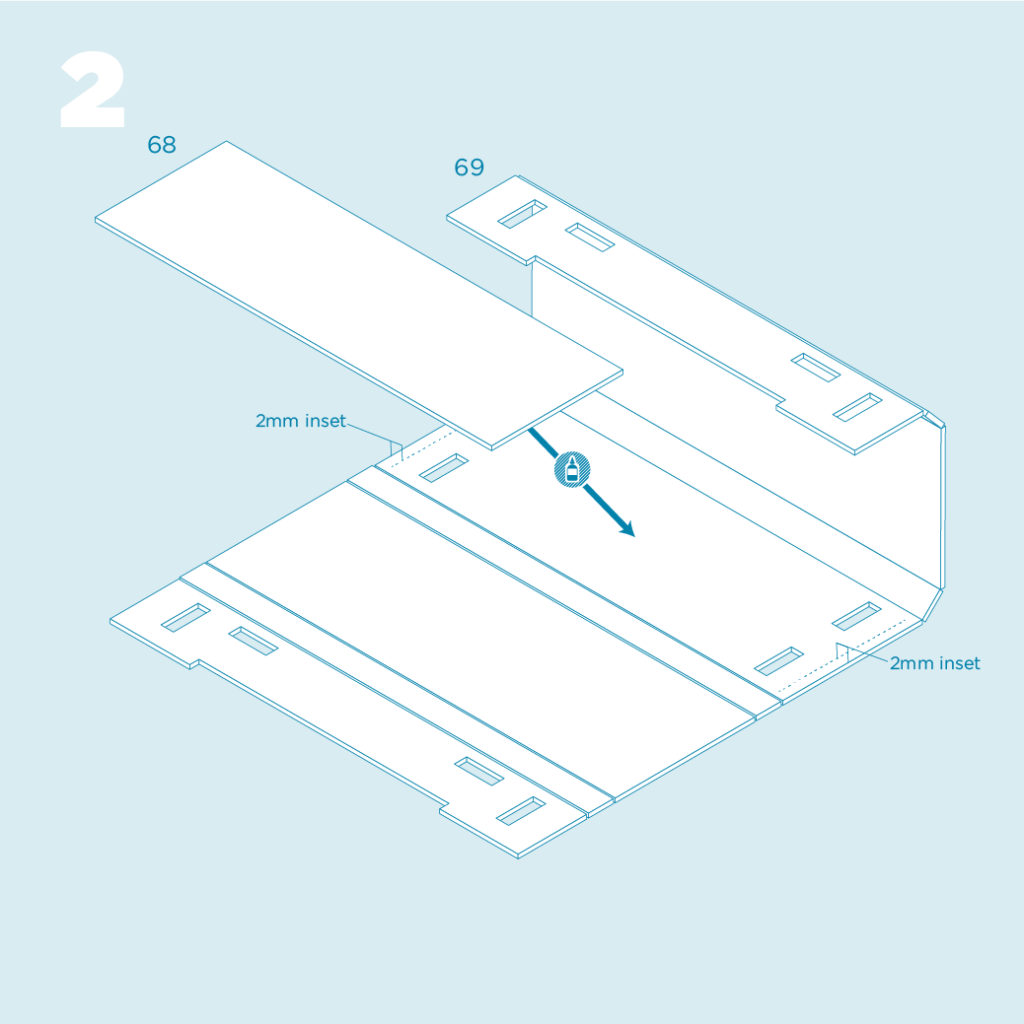
- On piece 69 ensure all scores are crisply and evenly folded.
- Then ensure piece 68 is glued into the area indicated as centered as possible on all edges.
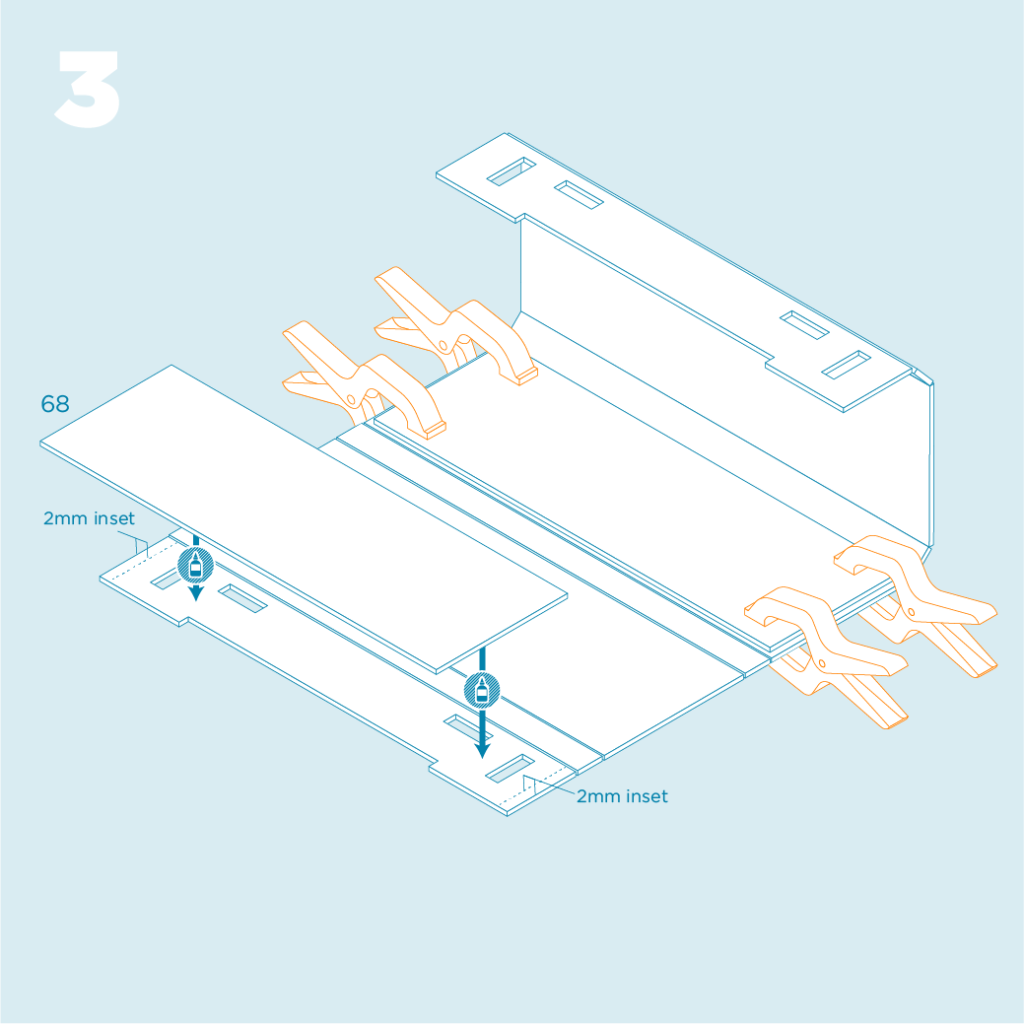
- Clamp previous piece as shown.
- Glue additional piece 68 into place, with similar tolerances on the edges.
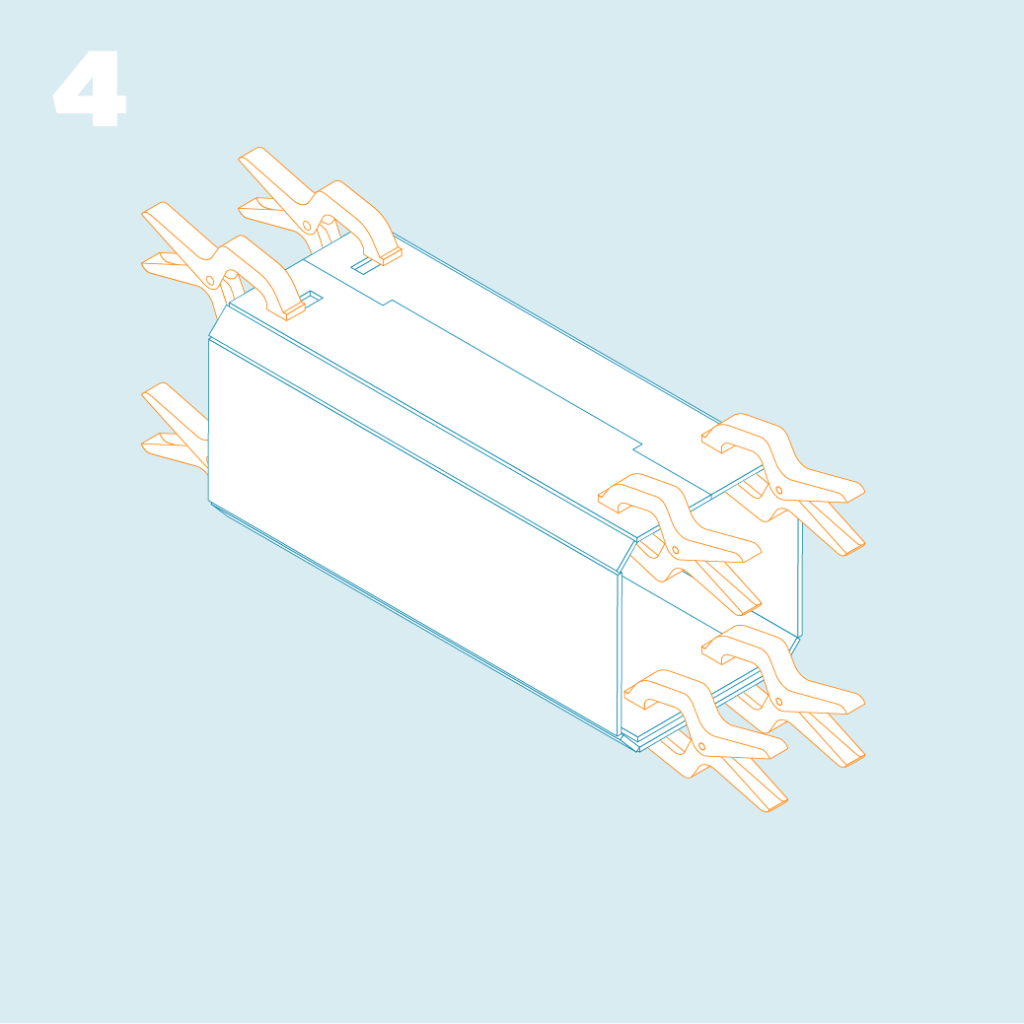
- Wrap piece 69 fully around, gluing additional piece 68 into place.
- Clamp as shown and allow to dry.
- This forms the CONTAINER EXTERIOR piece.

- Glue pieces 64 and 65 to each other as shown. Their back sides should be glued.
- Piece 64 should be as centered as possible within piece 65.
- Clamp and allow to dry.
- Two of these form the END PIECES for the Container.
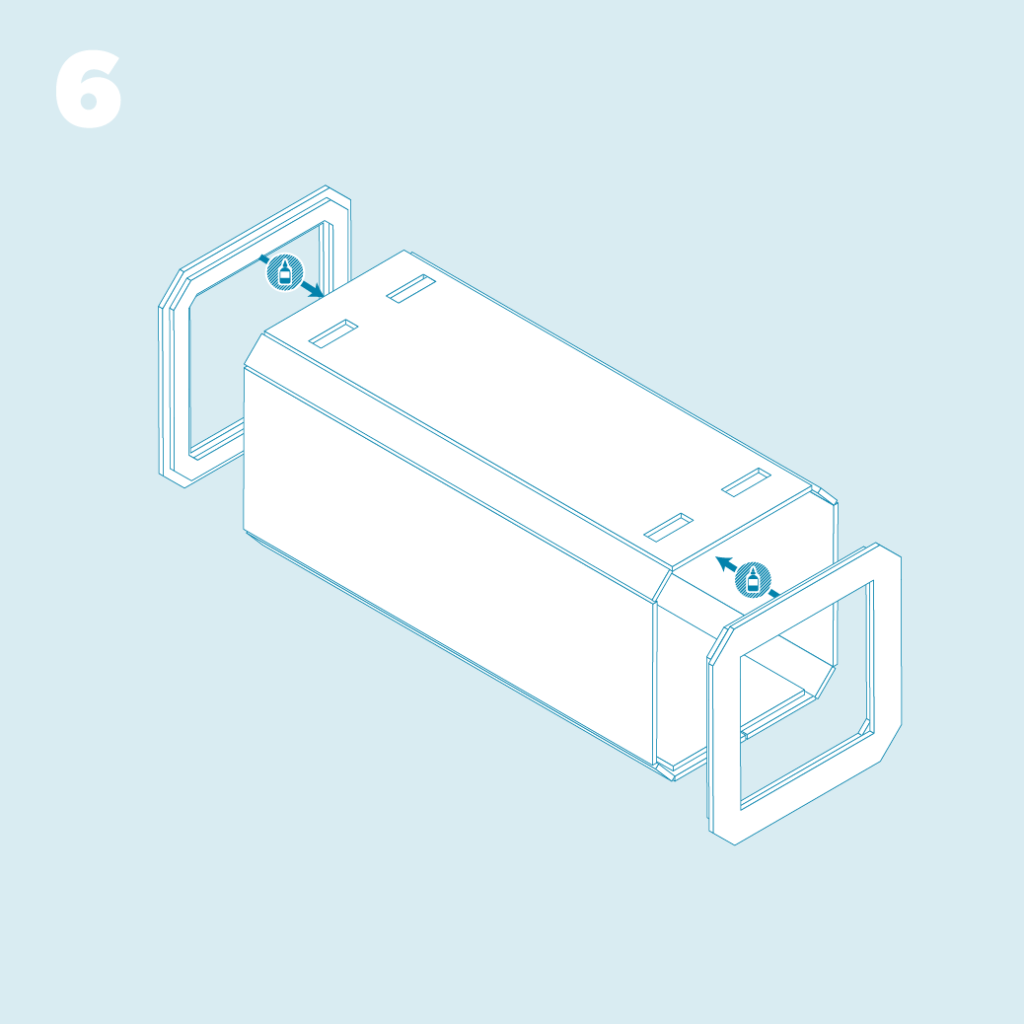
- Run a thin line of glue along the outside edge of piece 64 on both assembled END PIECES.
- Insert them into the ends of the assembled CONTAINER EXTERIOR piece.
- Clean any excess glue and allow to dry.
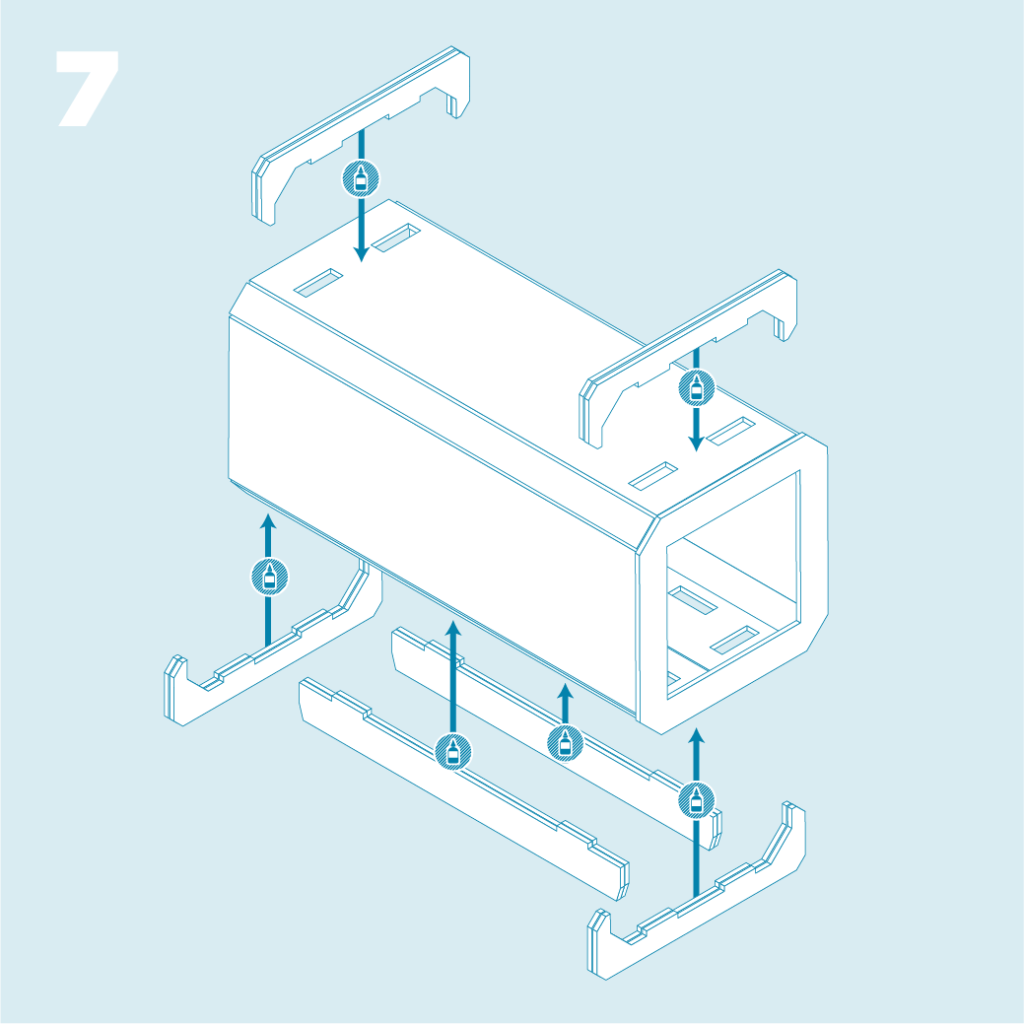
- Glue and assemble as indicated.
- Please see TIPS & TRICKS video for the most effective assembly method.

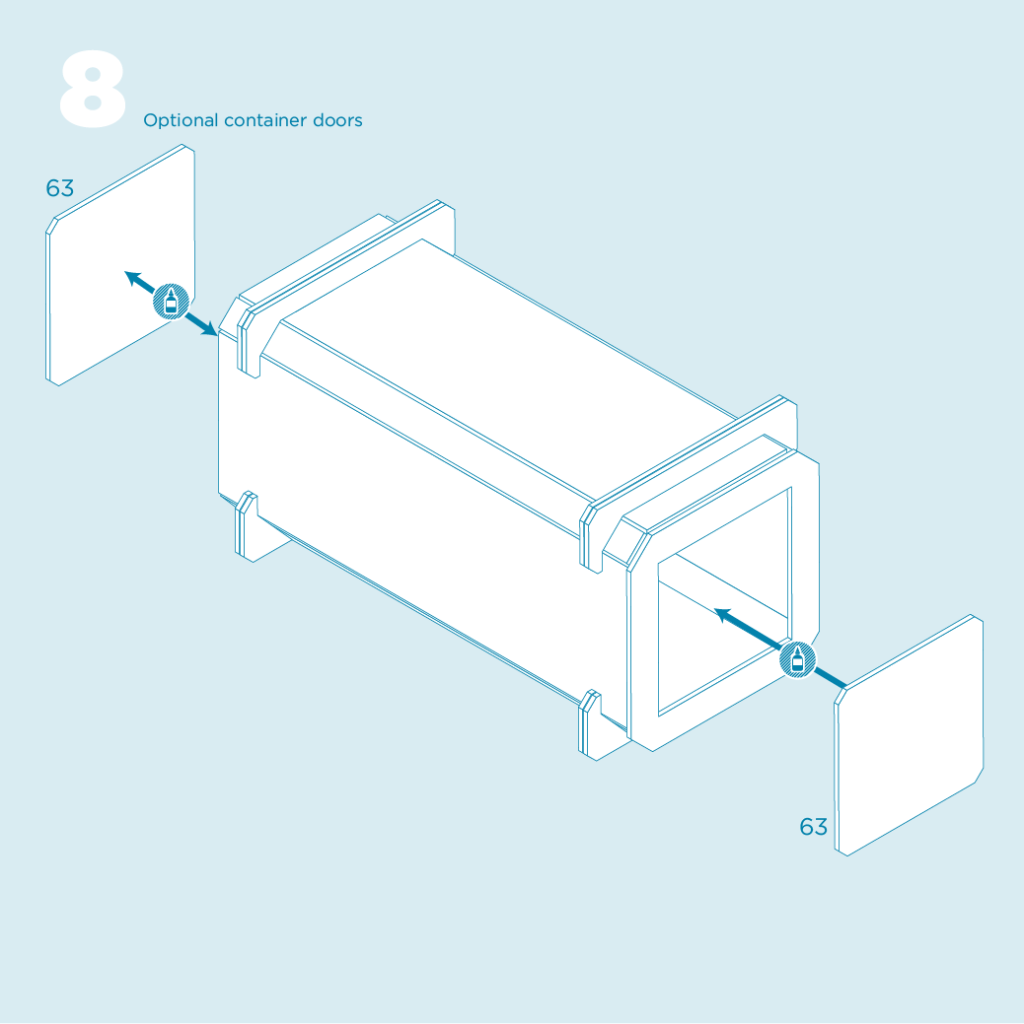
- OPTIONAL – You can glue doors onto one or both ends of your container as desired.