- NOTE – The MagLev Rail Depot set has pieces spread across multiple sheets in some cases. If you find you’re missing a piece, find it on another sheet.
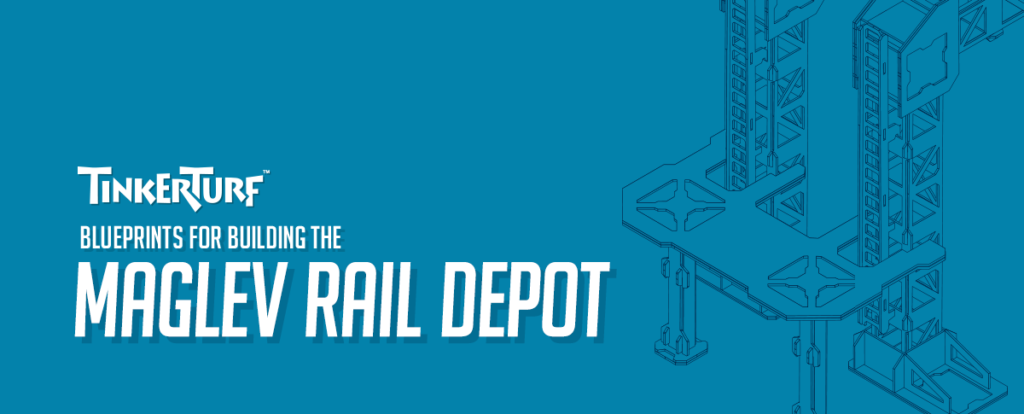
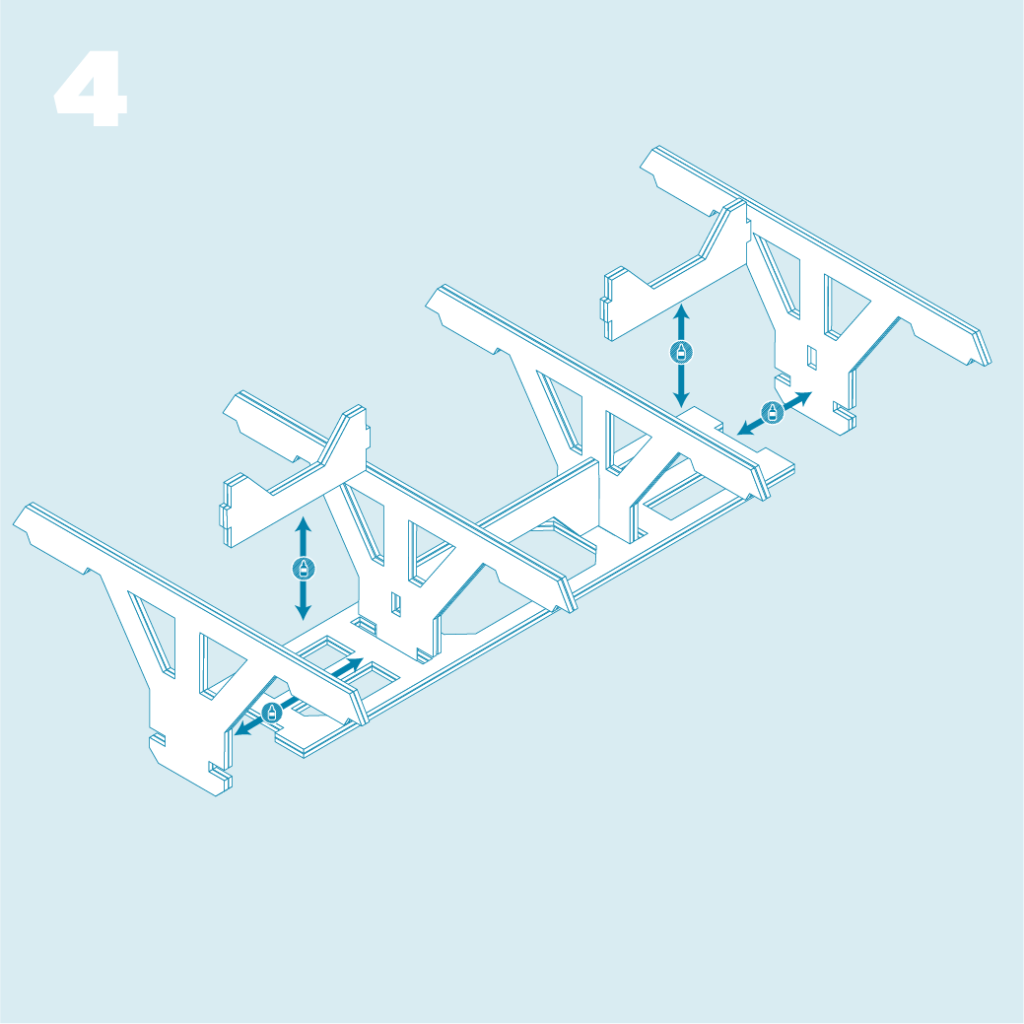
- Glue and assemble as indicated.
- Make sure that doubled up edges are aligned before drying.
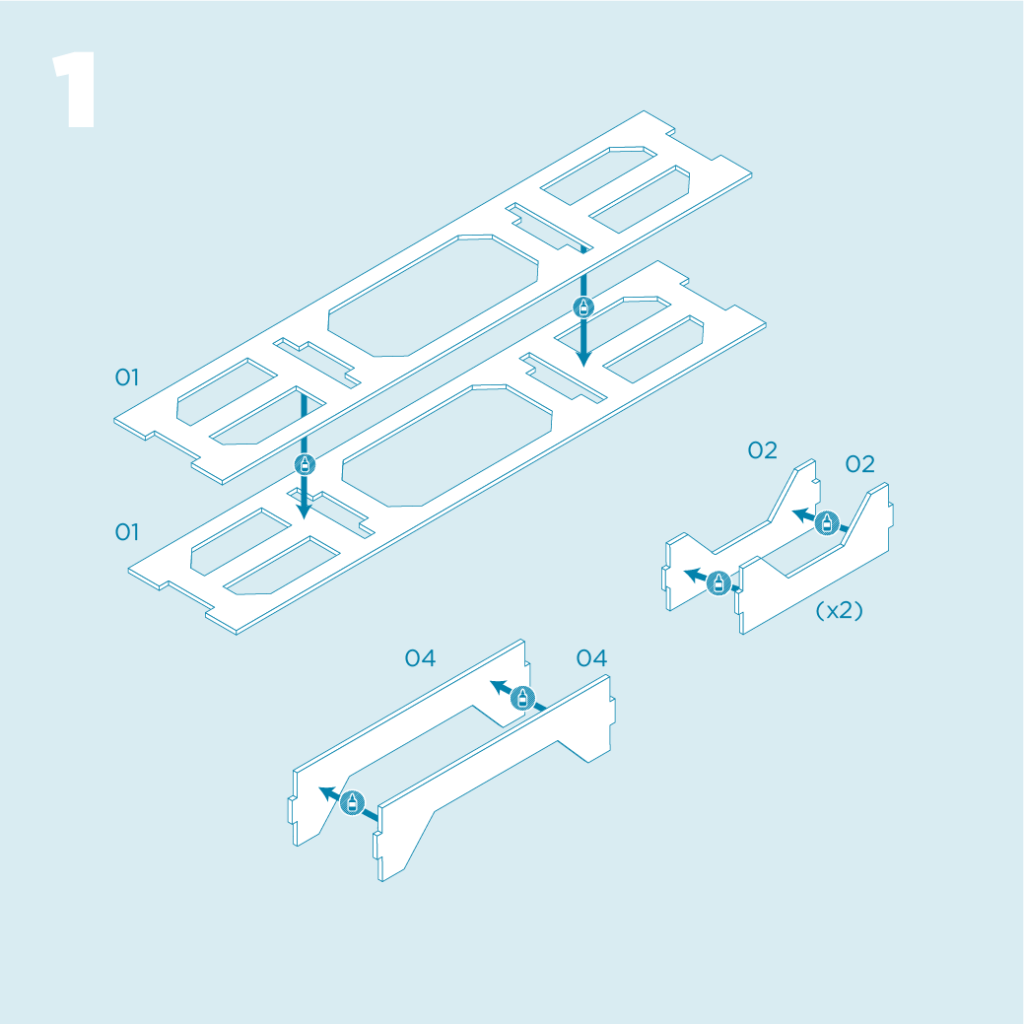
- Note that piece 03a is slightly different from pieces 03b and 03c.
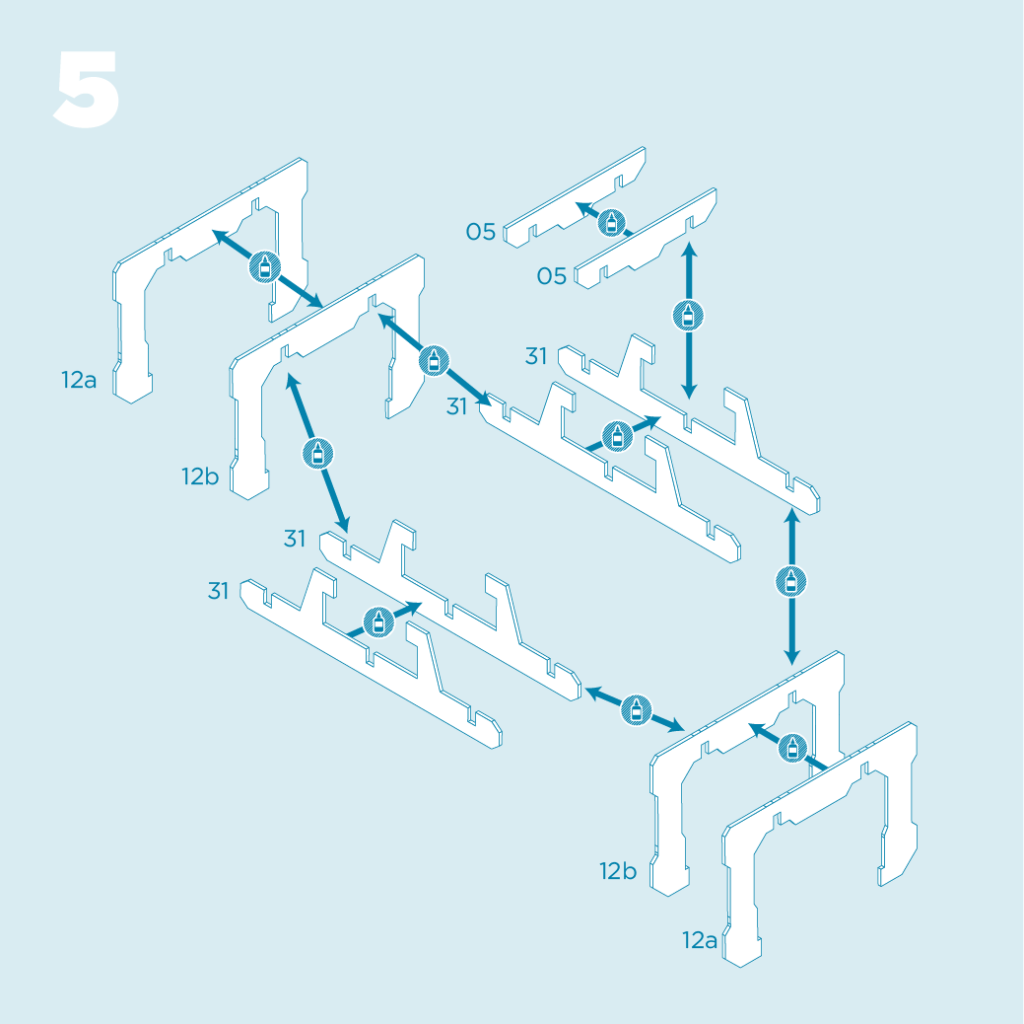
- Glue and assemble as indicated.
- Make sure that doubled up edges are aligned before drying.
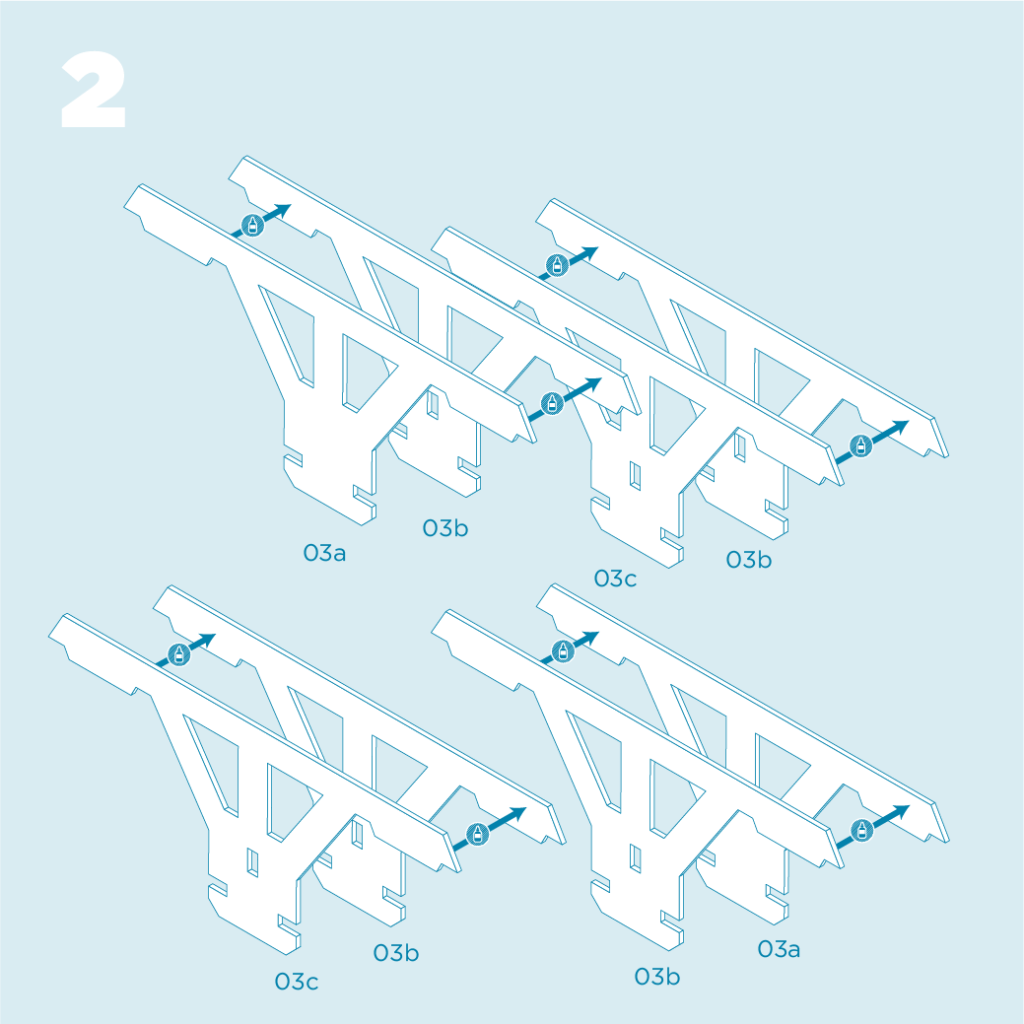
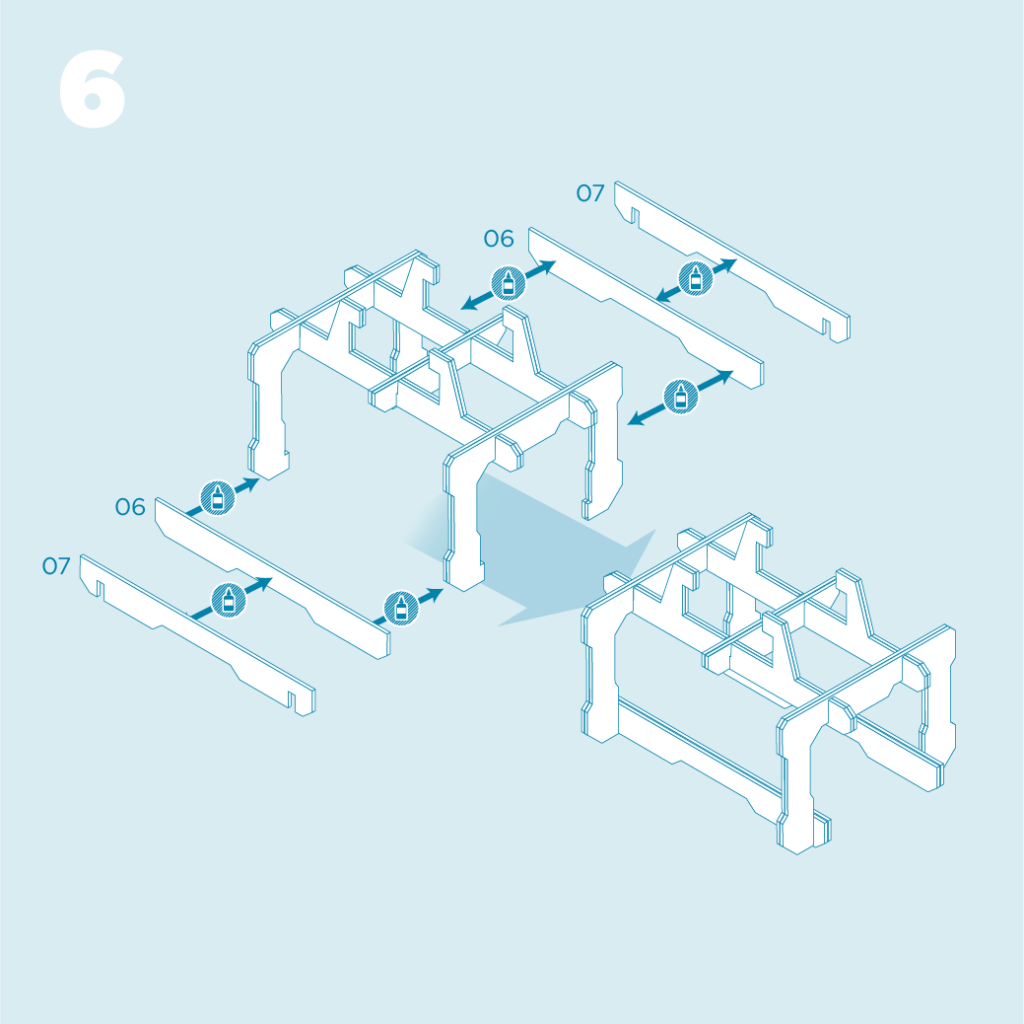
- Glue and assemble as indicated.
- Glue and assemble as indicated.
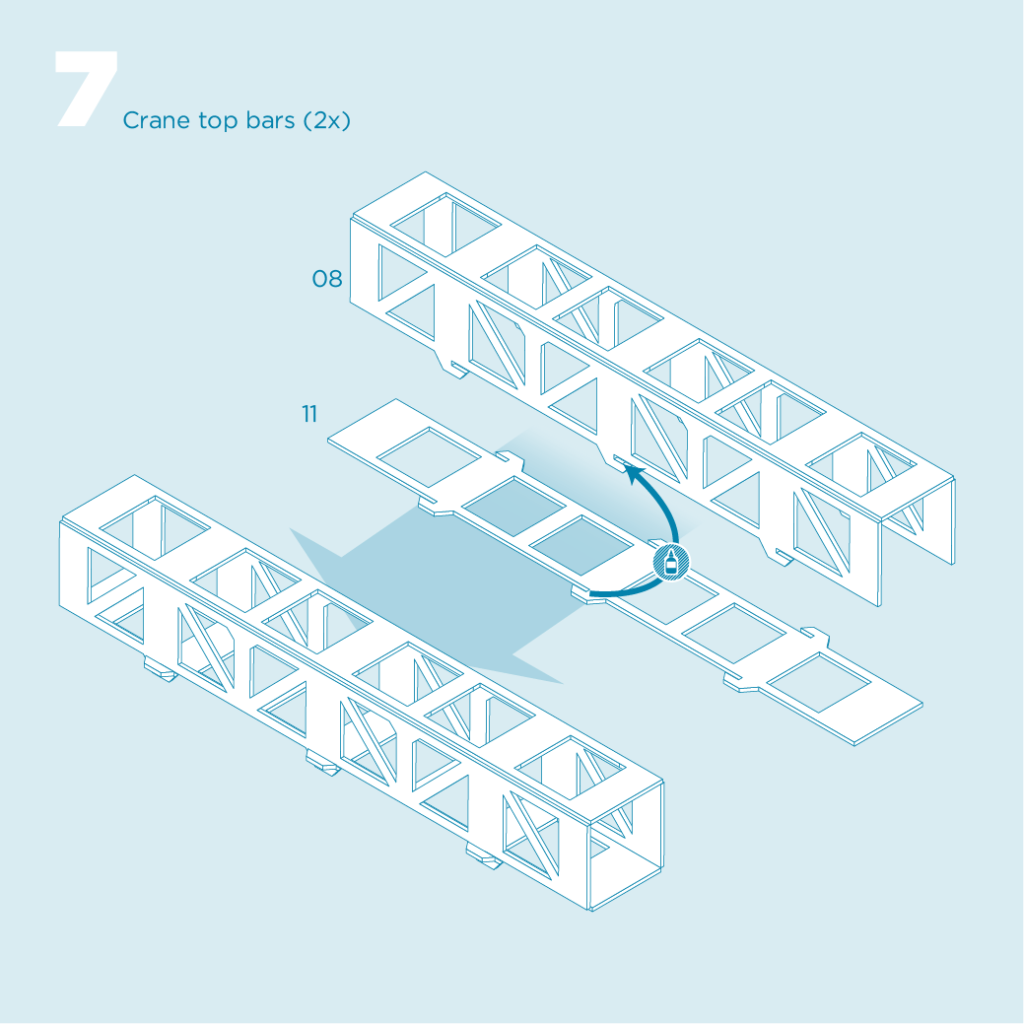
- This forms the CRANE TRACK piece.
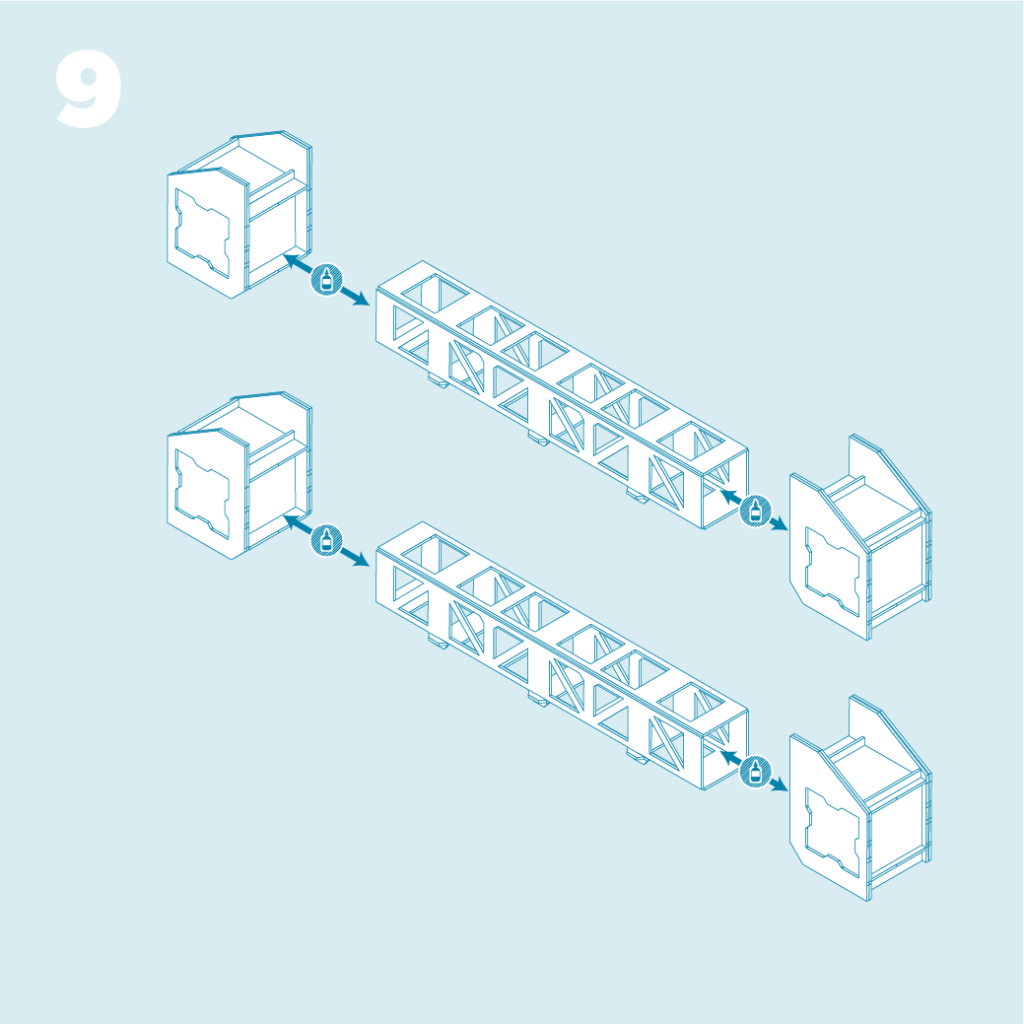
- Glue and assemble as indicated.
- Make sure that doubled up edges are aligned before drying.
- This creates the individual components of the CONTAINER CRANE piece.
- Glue and assemble the individual components of the CONTAINER CRANE as indicated.
- This creates the CONTAINER CRANE piece.
- OPTIONAL – If you have Containers they will fit into the CONTAINER CRANE piece as indicated below (frame 19).
- On piece 08 ensure all scores are crisply and evenly folded.
- When assembling top bar pieces put glue dots in the end of the slots on the larger folded pieces before sliding on the smaller pieces.
- Check top bars for square before allowing to dry.
- These create the TOP pieces.
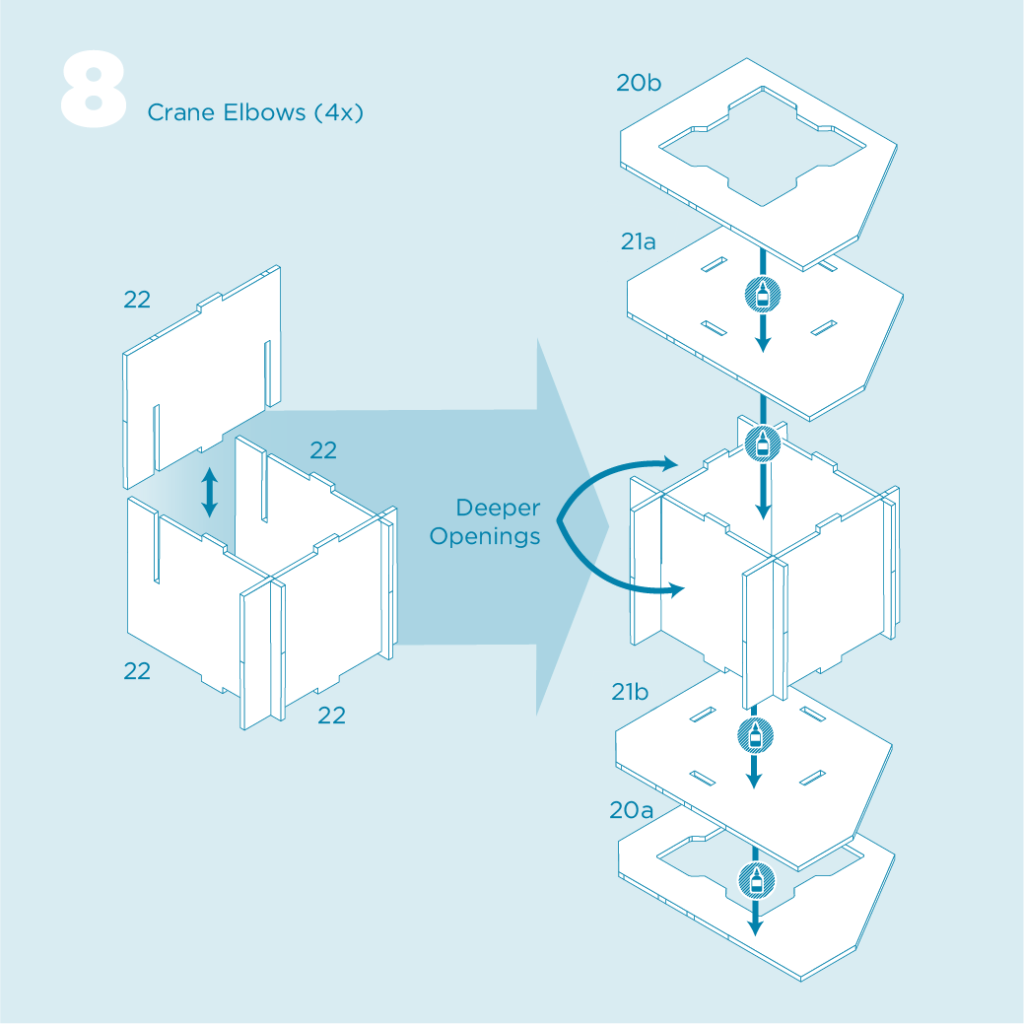
- Glue and assemble pieces 20a & 21b and 20b & 21a as shown.
- Make sure that doubled up edges are aligned before drying.
- Glue and assemble remaining pieces as indicated.
- These create the CRANE ELBOW pieces.

- Glue and assemble the TOP and CRANE ELBOW pieces as indicated.
- The TOP pieces fit loosely into the CRANE ELBOW pieces. Center the TOP pieces before drying for best results.
- These create the TOP SUPPORT pieces.
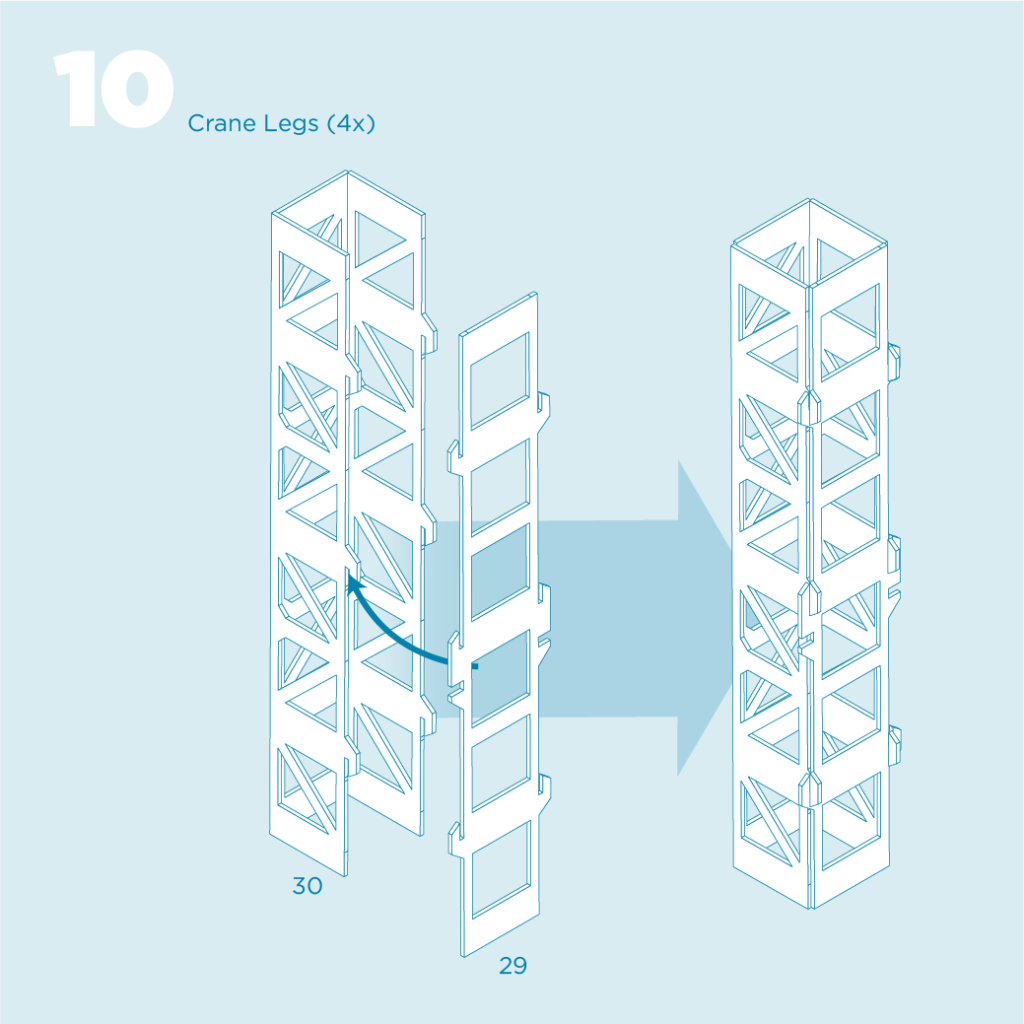
- On piece 30 ensure all scores are crisply and evenly folded
- When assembling leg pieces put glue dots in the end of the slots on the larger folded pieces before sliding on the smaller pieces.
- Check top bars for square before allowing to dry.
- These create the LEG pieces.
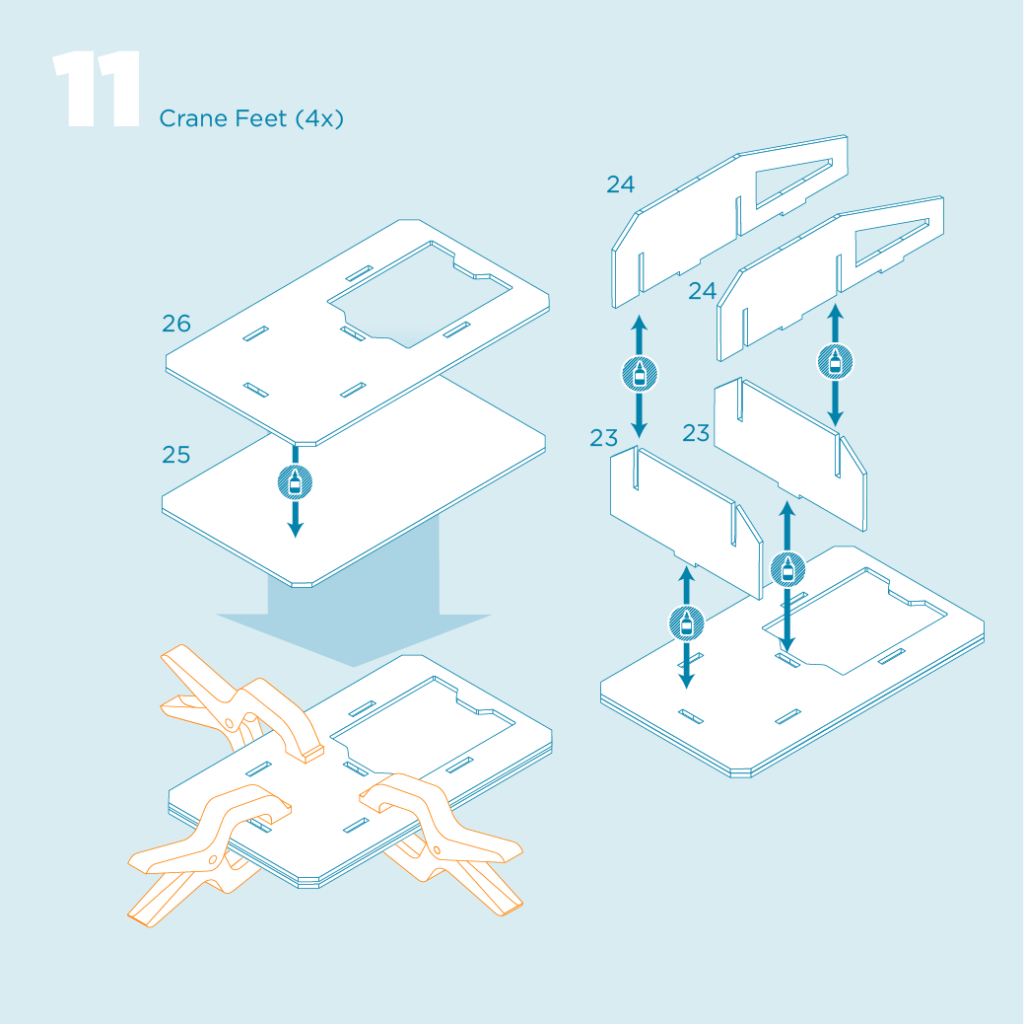
- Glue and assemble pieces 25 & 26 as shown.
- Make sure that doubled up edges are aligned before drying.
- Glue and assemble remaining pieces as indicated.
- These create the CRANE FEET pieces.
- Please see TIPS & TRICKS video for the most effective assembly method.
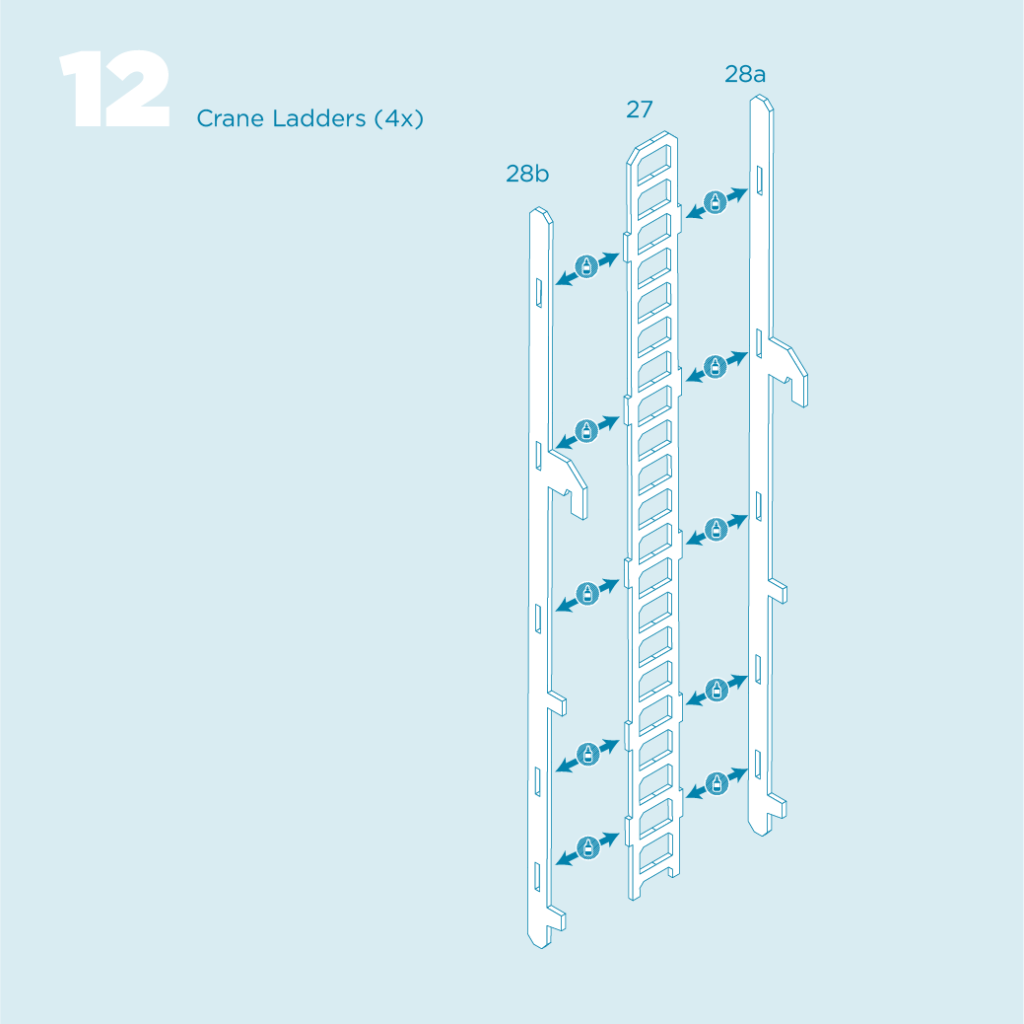
- When attaching side pieces to the ladder piece, insert tabs into slots on the front rolled edge face of the side pieces.
- These create the SIDE LADDER pieces.
- No glue required.
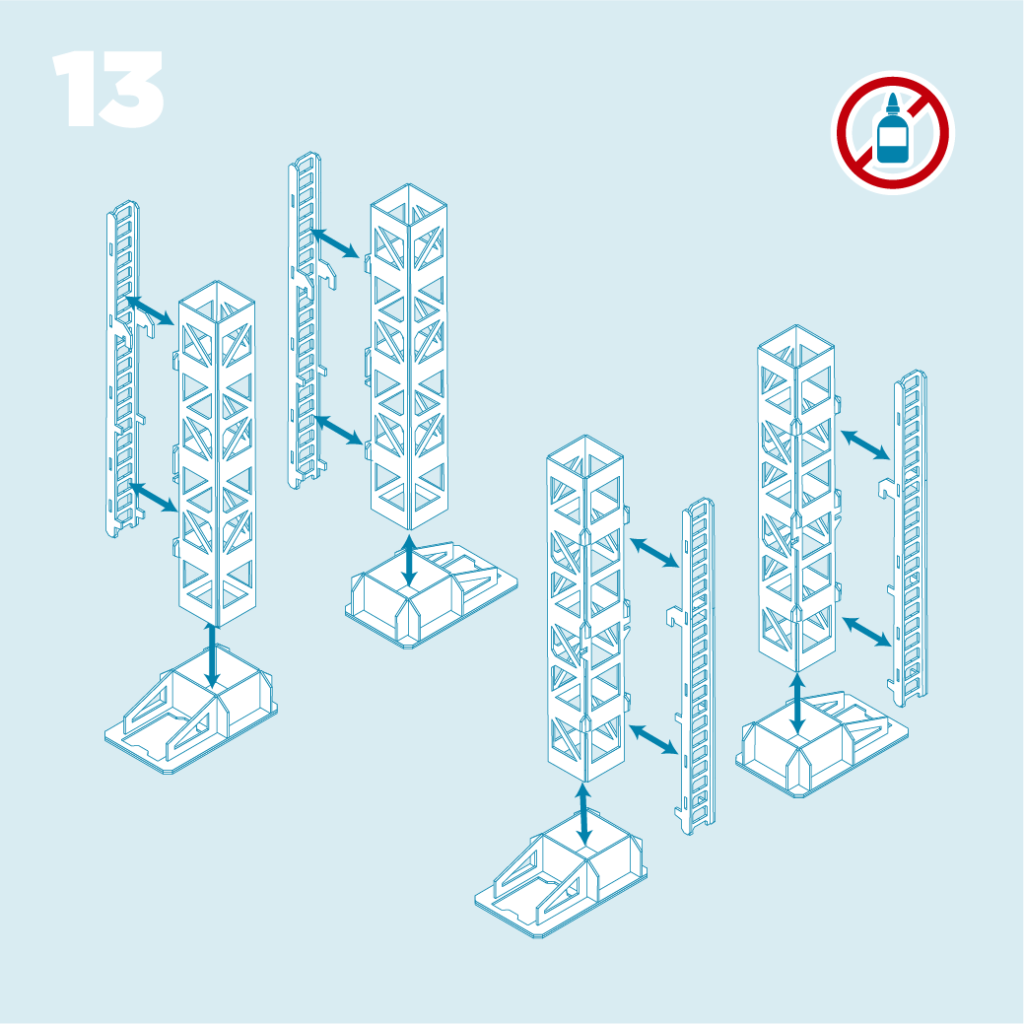
- Insert the LEG pieces into the CRANE FEET pieces as shown.
- Making sure the notched outer side of the LEG piece has the larger side facing up as shown.
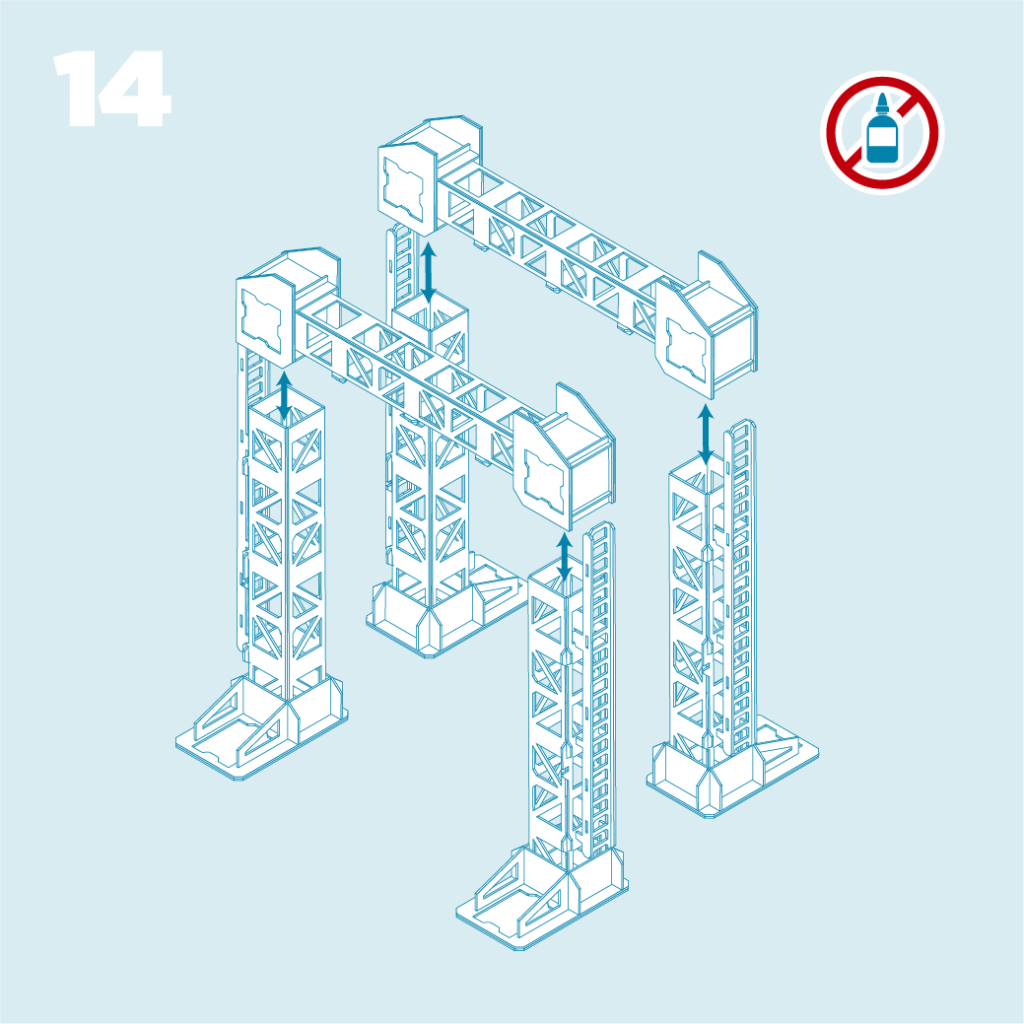
- Hang the SIDE LADDER pieces from the LEG pieces as shown within the square cutouts.
- These create the LEG SUPPORT pieces.
- OPTIONAL – If desired for ease of assembly and storage you can glue these assemblies together. Please see TIPS & TRICKS video for the proper method.
- No glue required.
- Place the assembled TOP SUPPORT pieces onto the assembled LEG SUPPORT pieces as shown.
- This creates two assembled CRANE STRUCTURE pieces.

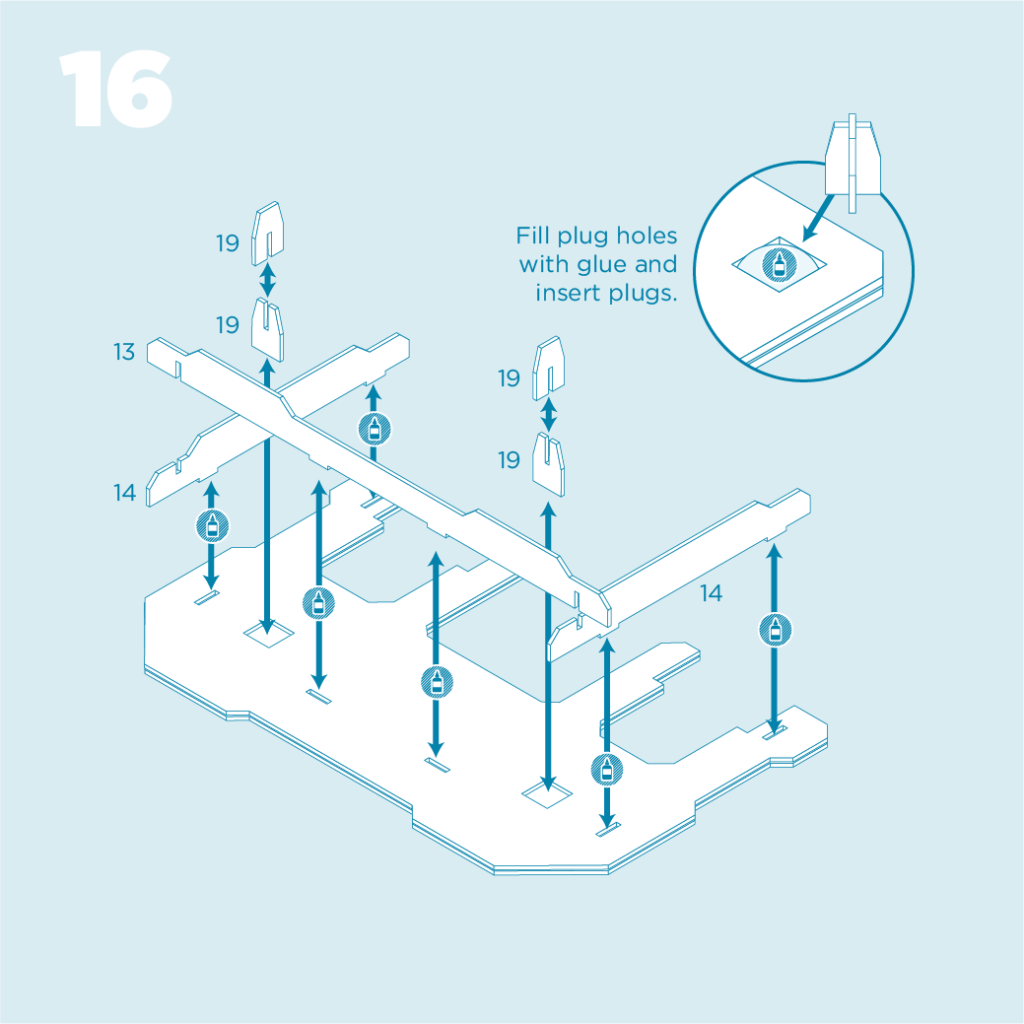
- Glue and assemble pieces 15 & 16 as shown.
- Make sure that doubled up edges are aligned before drying.
- These create the PLATFORM TOP pieces.
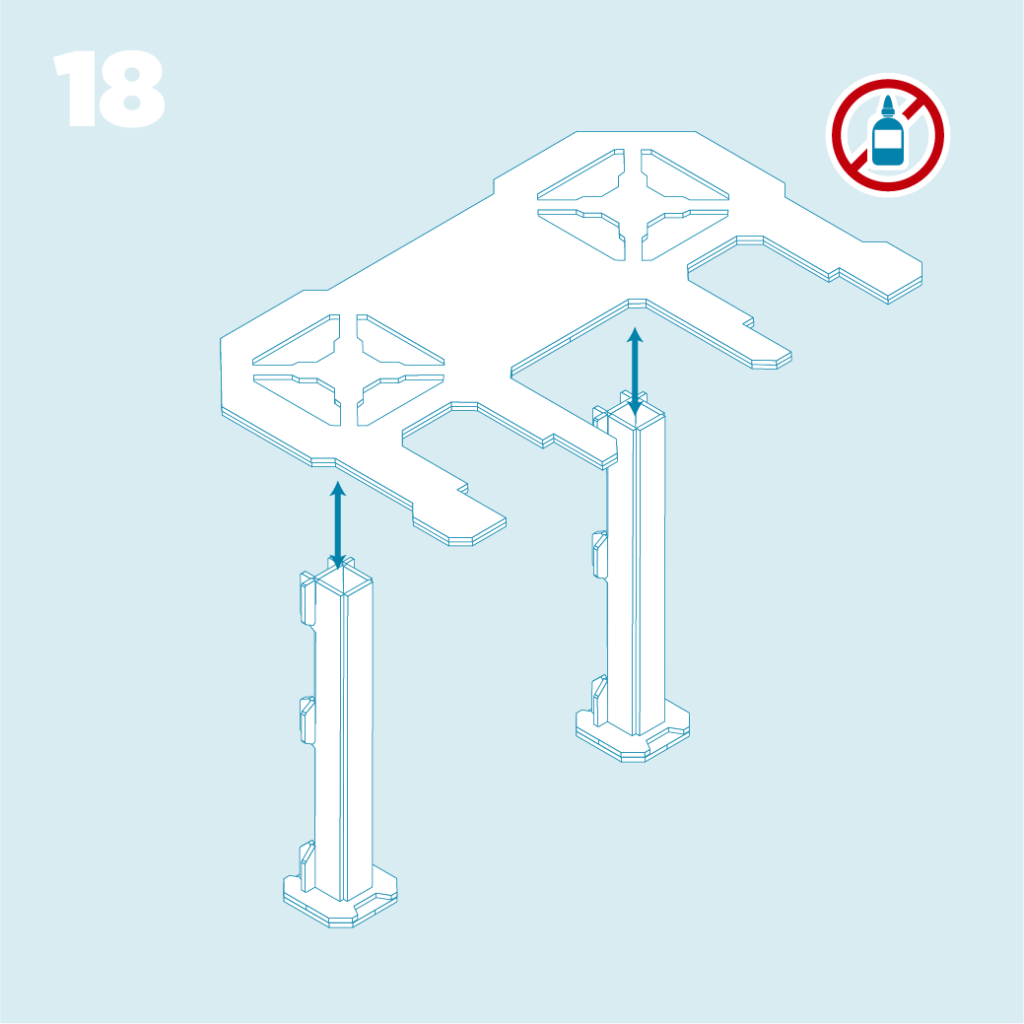
- Assemble support structure as shown.
- Use a generous bead of glue on edges that contact the assembled PLATFORM TOP pieces.
- Please see TIPS & TRICKS video for the most effective method of gluing the plugs.
- Clean any excess glue and allow to dry.
- These create the PLATFORM pieces.
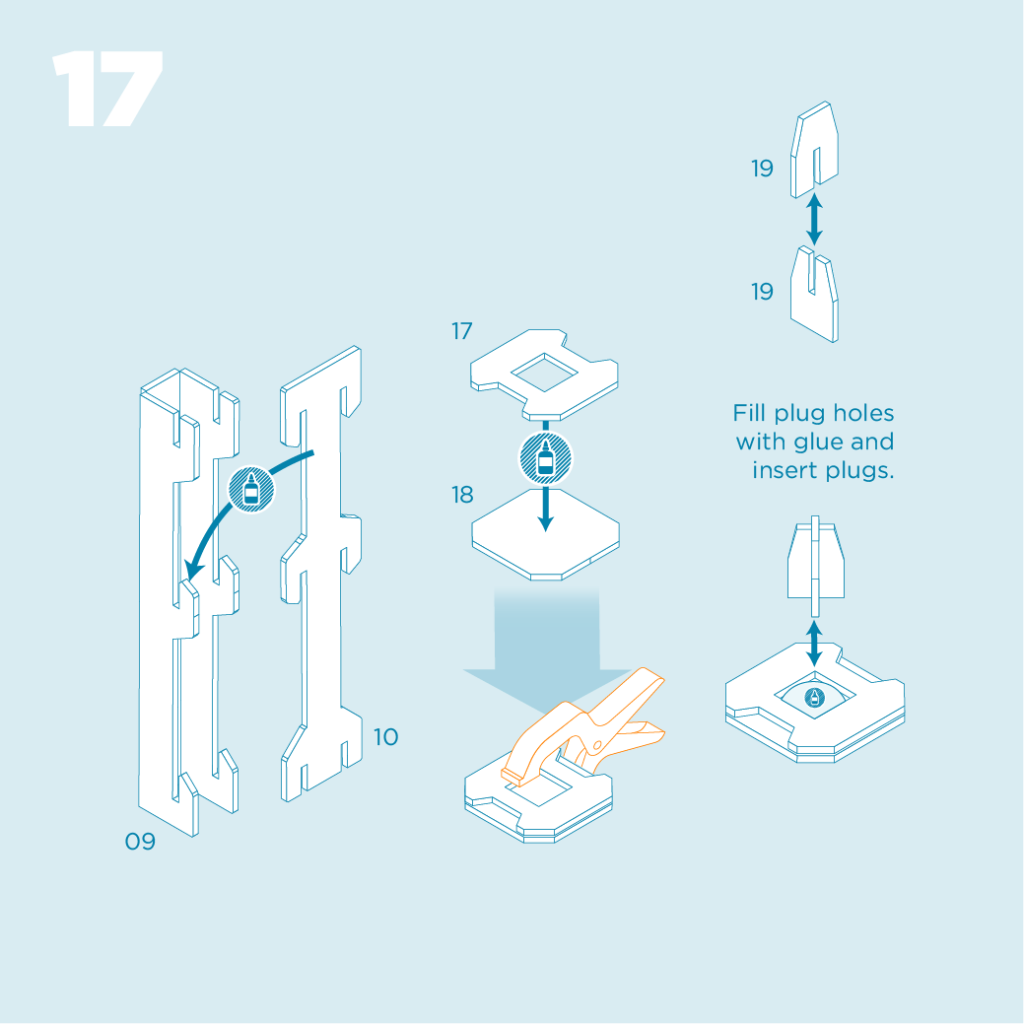
- On piece 09 ensure all scores are crisply and evenly folded.
- When assembling leg pieces put glue dots in the end of the slots on the larger folded pieces before sliding on the smaller pieces.
- Check legs for square before allowing to dry.
- Please see TIPS & TRICKS video for the most effective method of gluing the plugs.
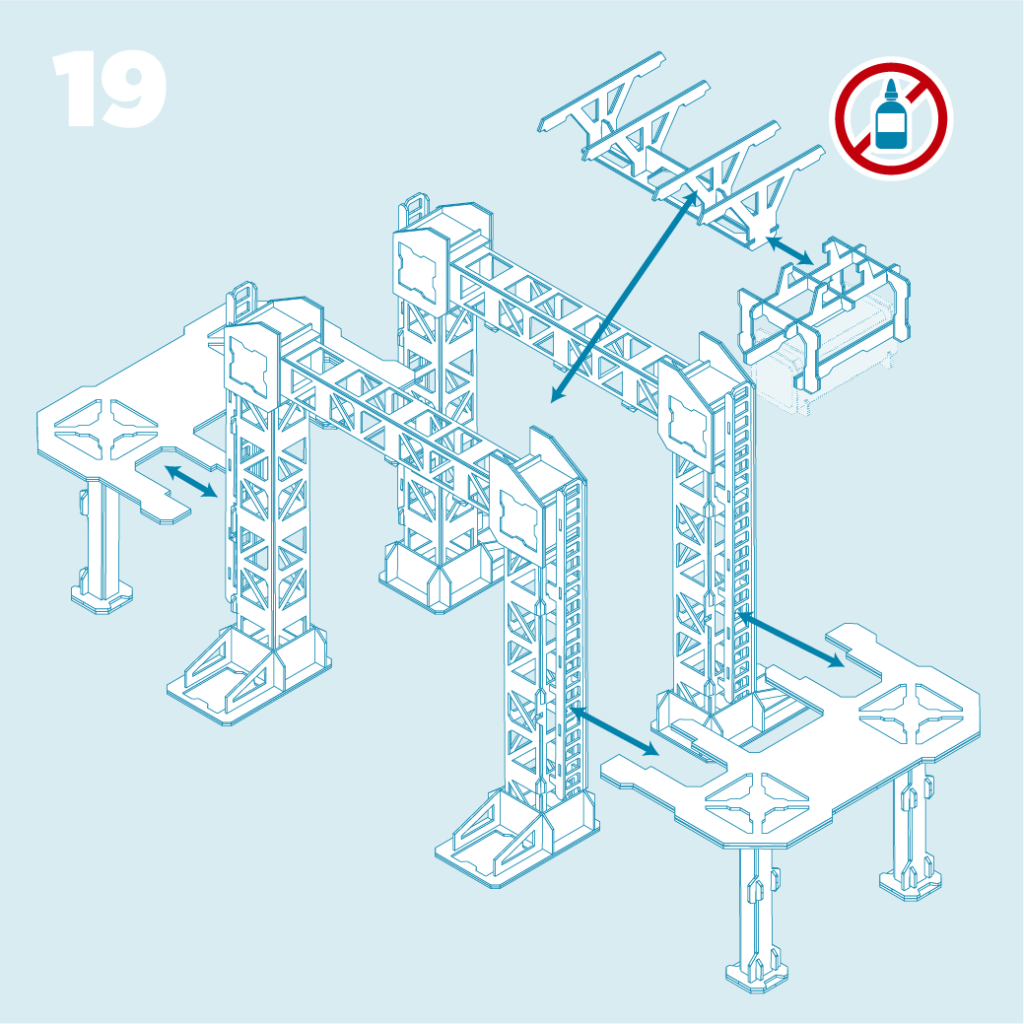
- PLATFORM pieces assemble onto legs & feet as indicated.
- No glue is required.
- Finally assemble all pieces together.
- No glue is required.
- OPTIONAL – If you have Containers they will fit into the CONTAINER CRANE piece as indicated.
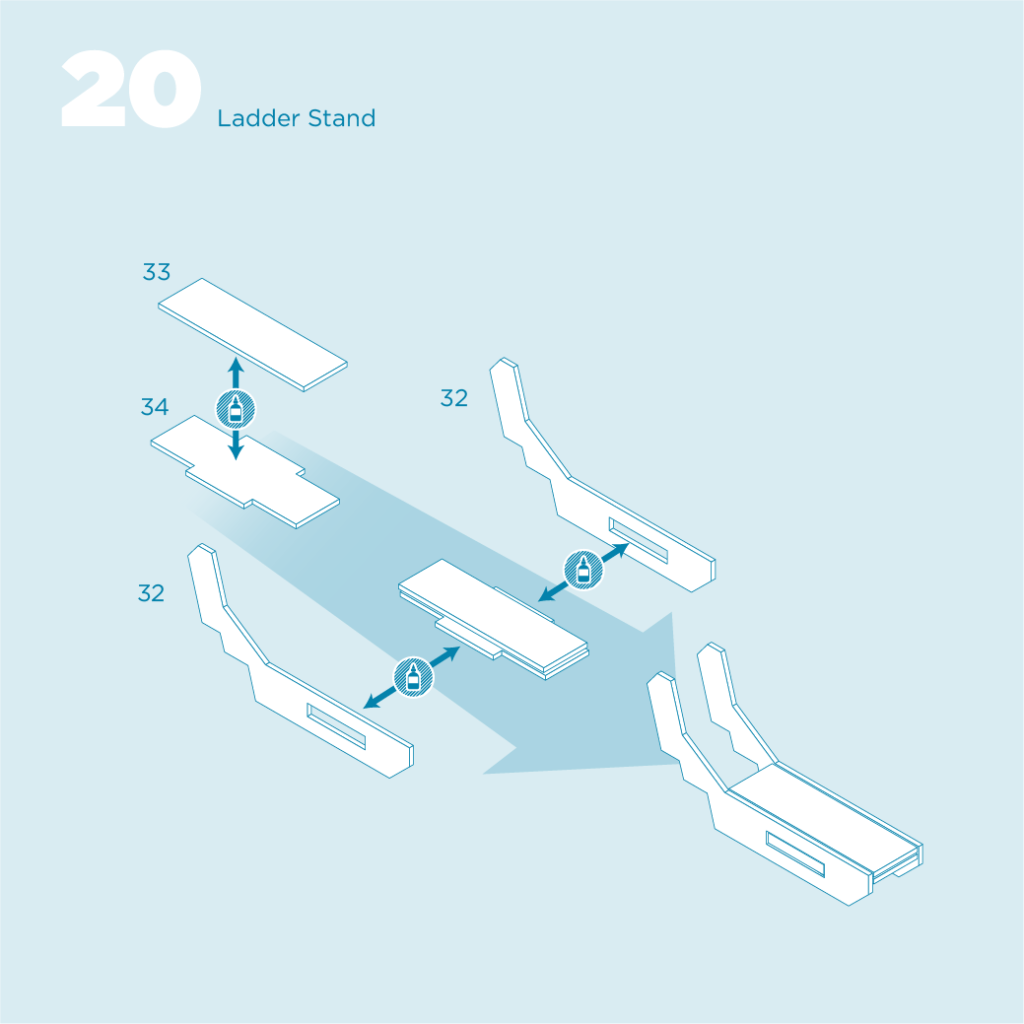
- Glue pieces 33 & 34 together first and let dry.
- Make sure that doubled up edges are aligned before drying.
- When attaching pieces 32 & 32, insert tabs into slots on the front rolled edge face of the side pieces.
- Make sure side pieces are straight up and down before drying.