- NOTE – The Elevations set has pieces spread across multiple sheets in some cases. If you find you’re missing a piece, find it on another sheet.
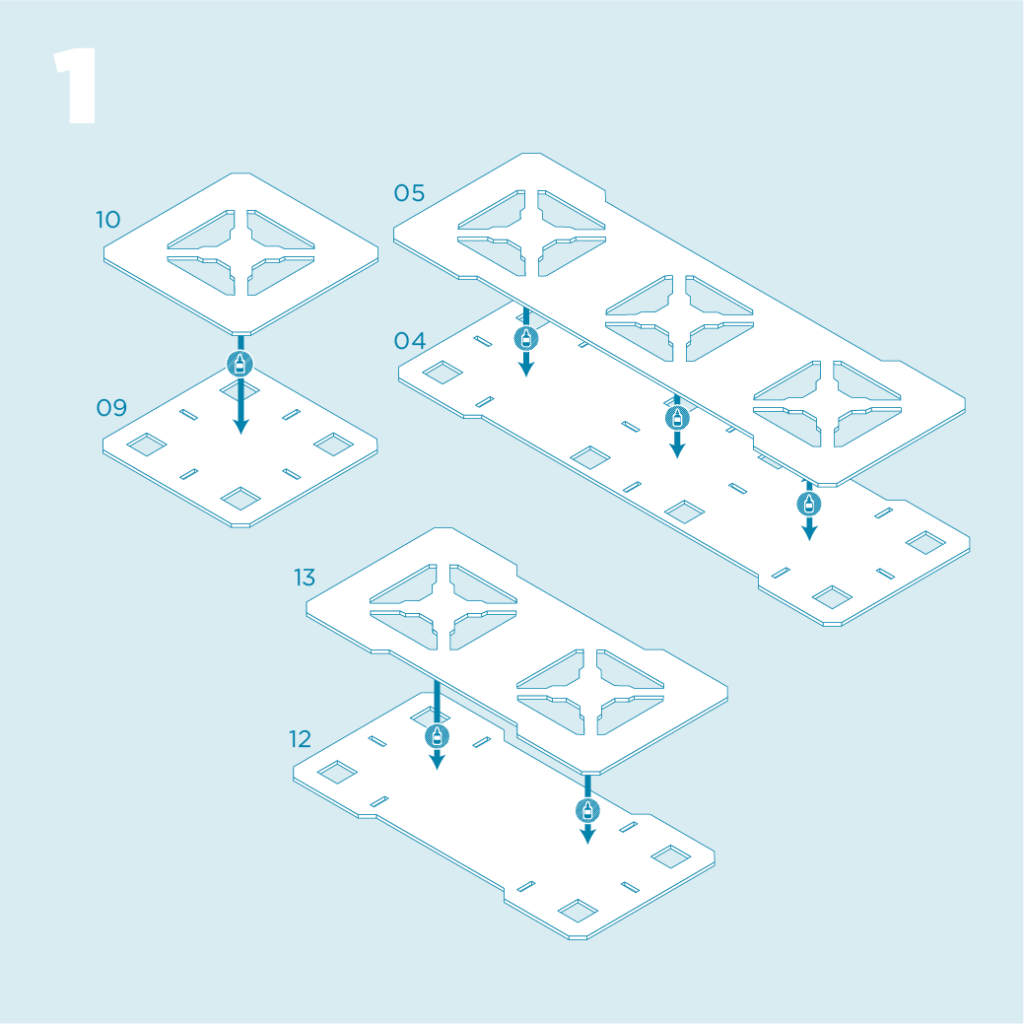
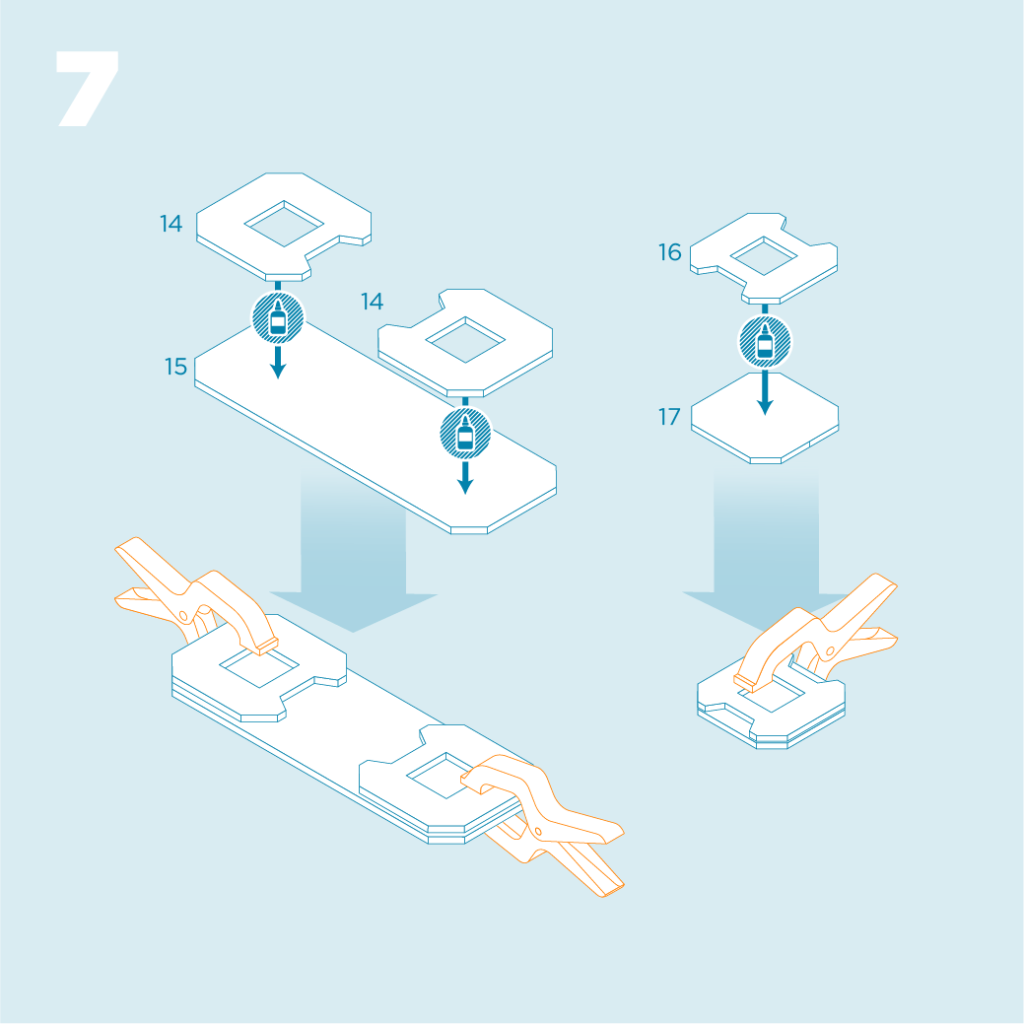
- Glue indicated pieces as shown.
- Make sure that doubled up edges are aligned before drying.
- These create the PLATFORM TOP pieces.
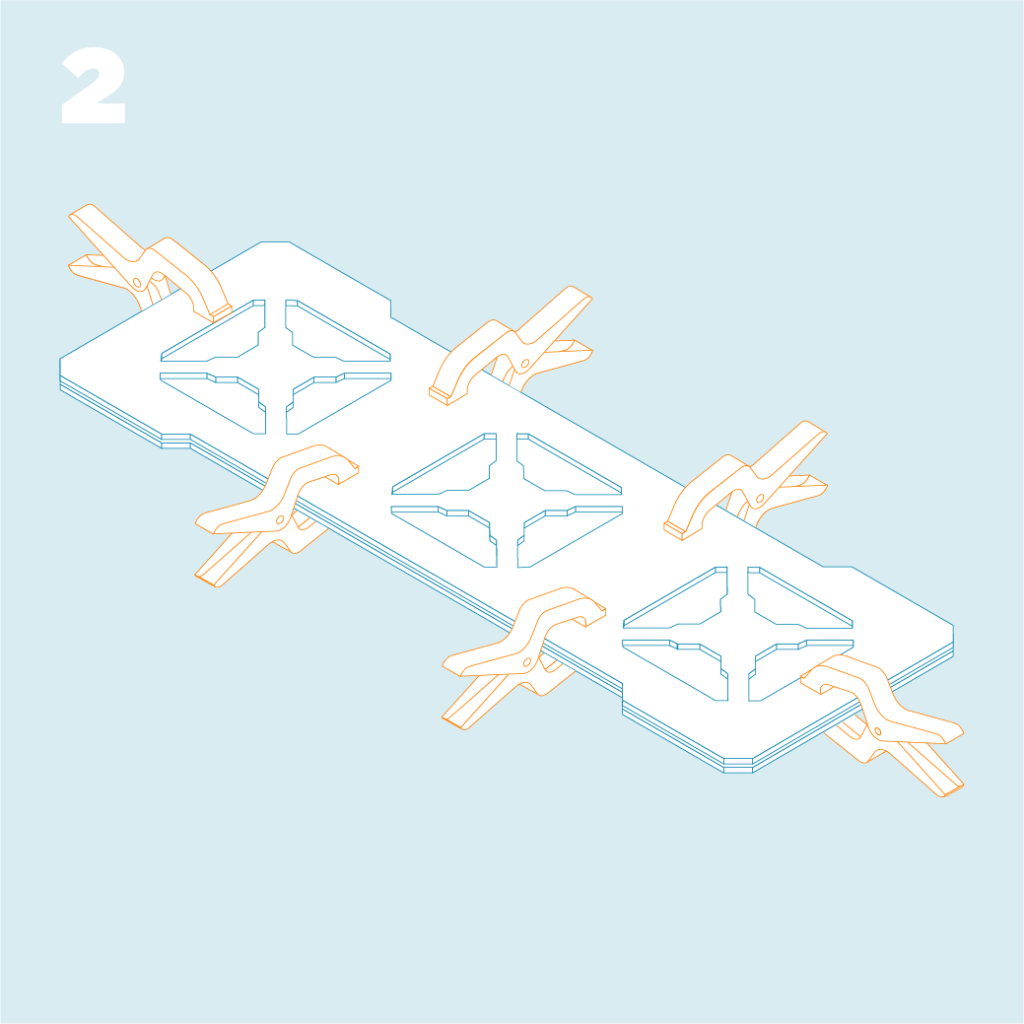
- Clamp pieces every 3 inches or so as shown to dry.
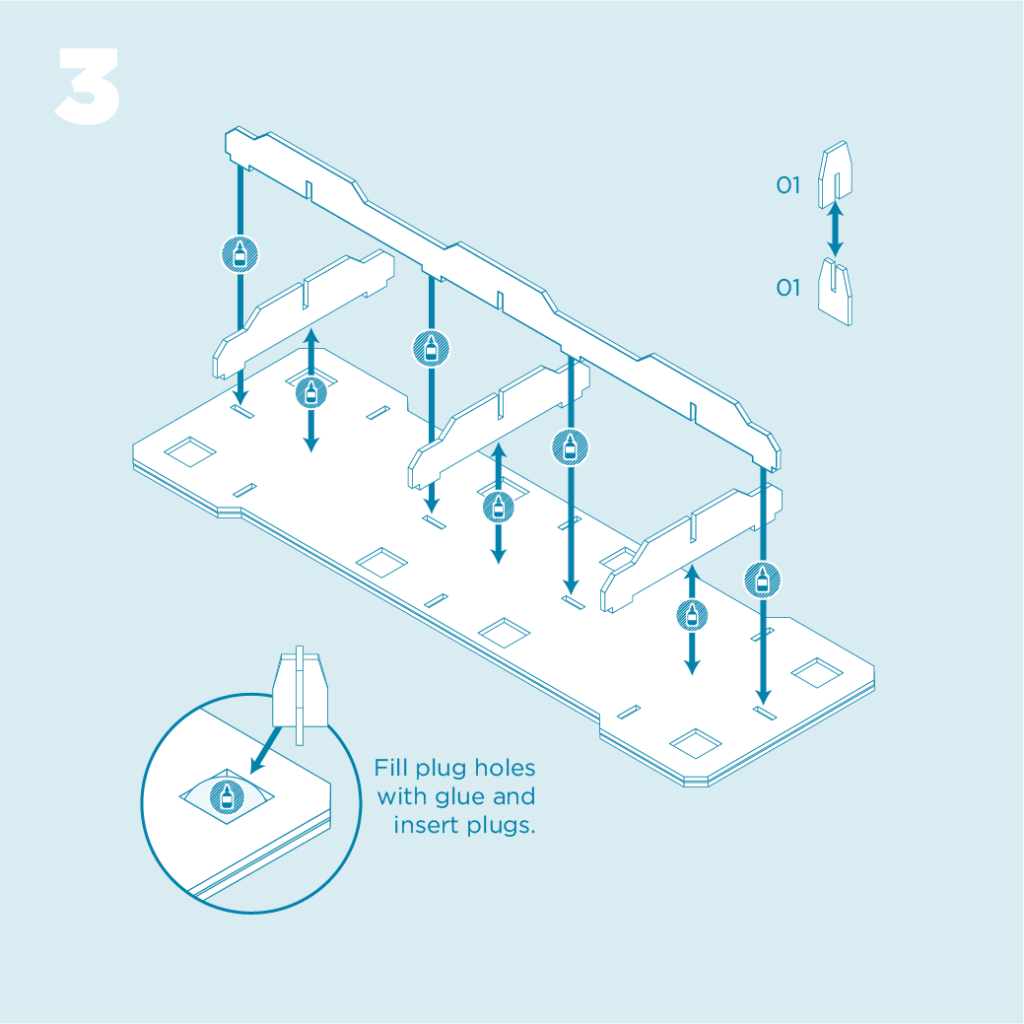
- Assemble support structure as shown.
- Use a generous bead of glue on edges that contact the assembled PLATFORM TOP pieces.
- Please see TIPS & TRICKS video for the most effective method of gluing the plugs.
- Clean any excess glue and allow to dry.

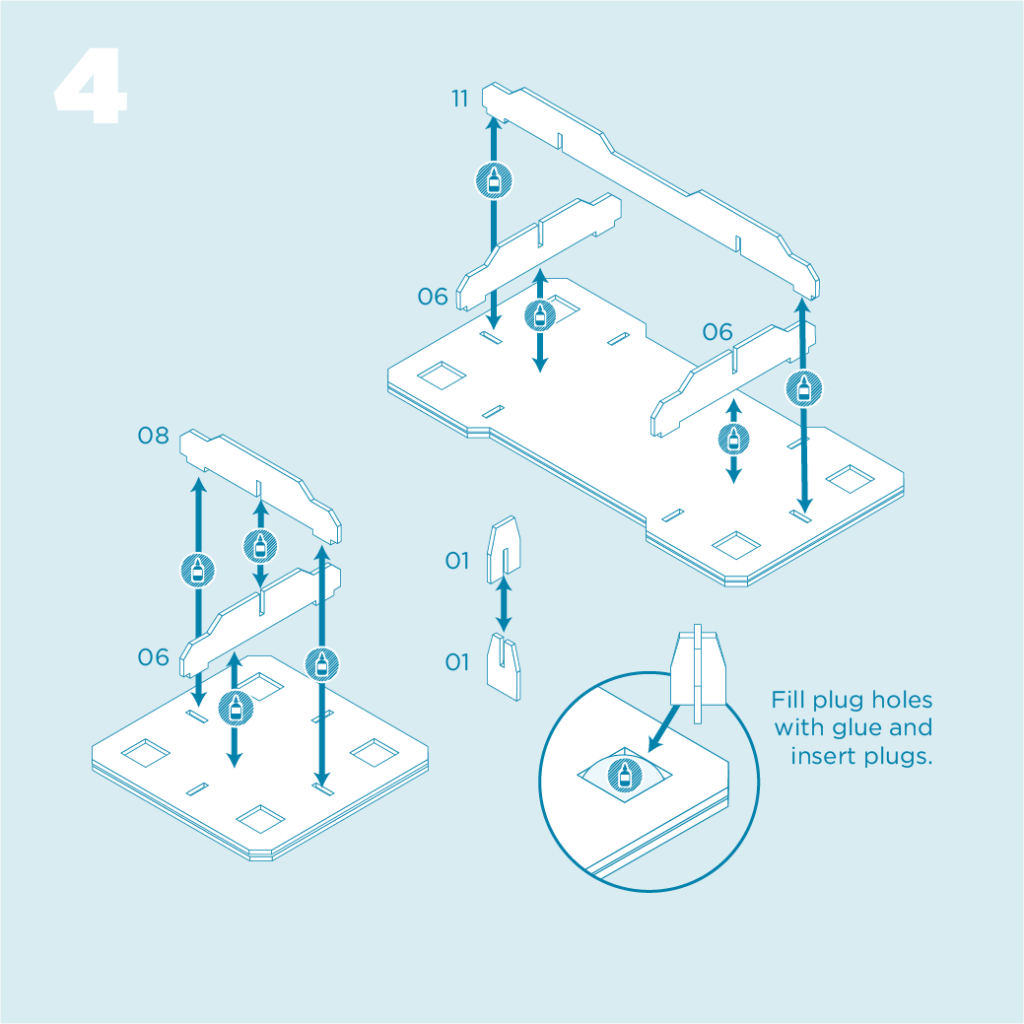
- Assemble similar to previous panel.
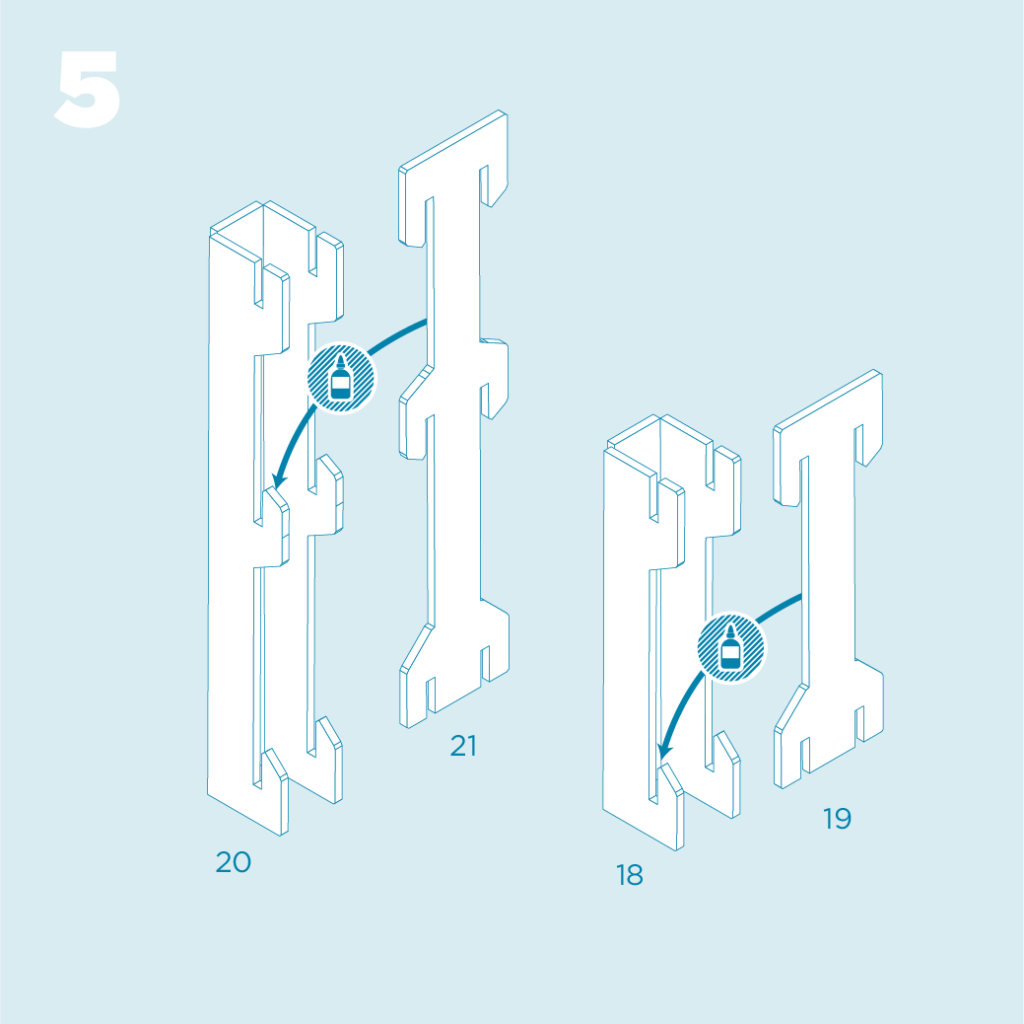
- On pieces 18 & 20 ensure all scores are crisply and evenly folded.
- When assembling leg pieces put glue dots in the end of the slots on the larger folded pieces before sliding on the smaller pieces.
- Check legs for square before allowing to dry.
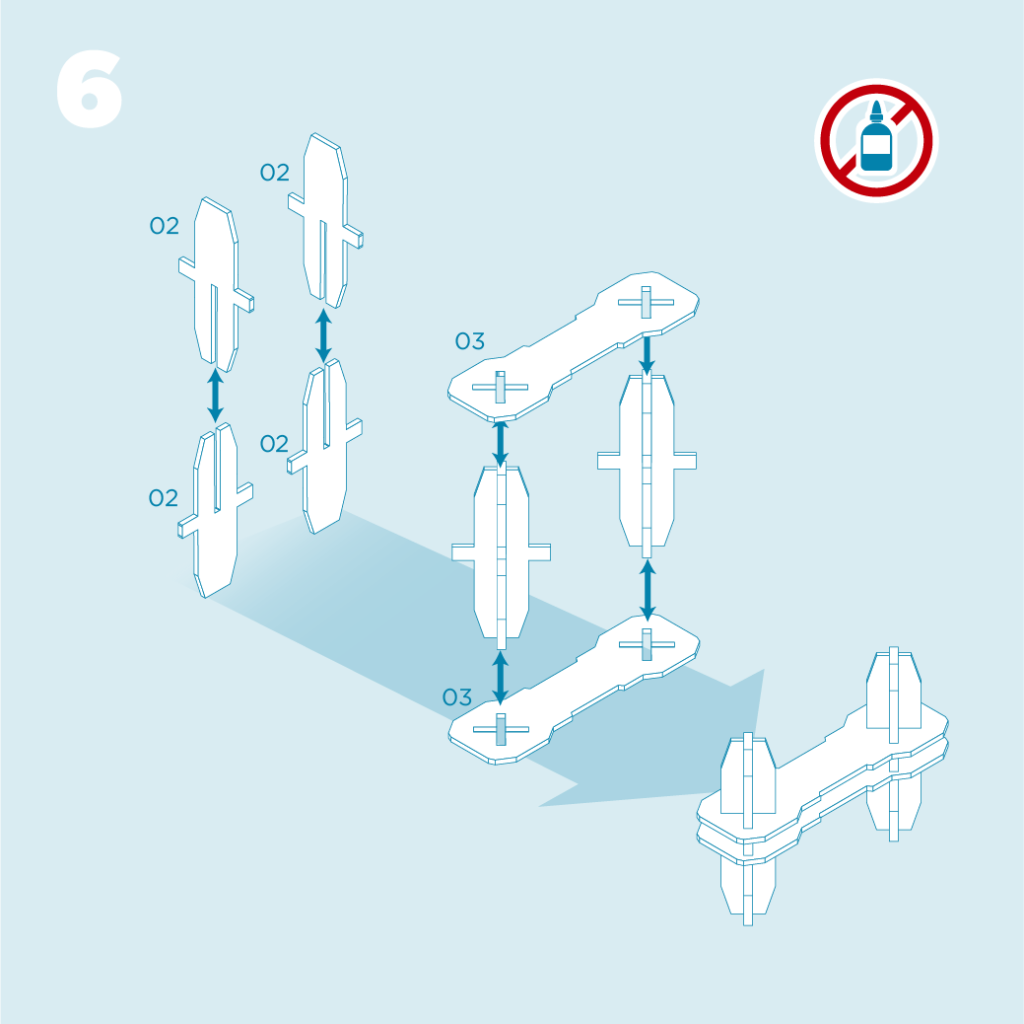
- NOTE – There are 2 extra 02 pieces in the set. That is expected.
- No glue is required.
- Assemble as indicated.
- These pieces fit snugly. Be careful when sliding piece 03 on the double plugs to not bend or tear any pieces. Slow and steady wins this race.
- Glue and assemble as indicated.
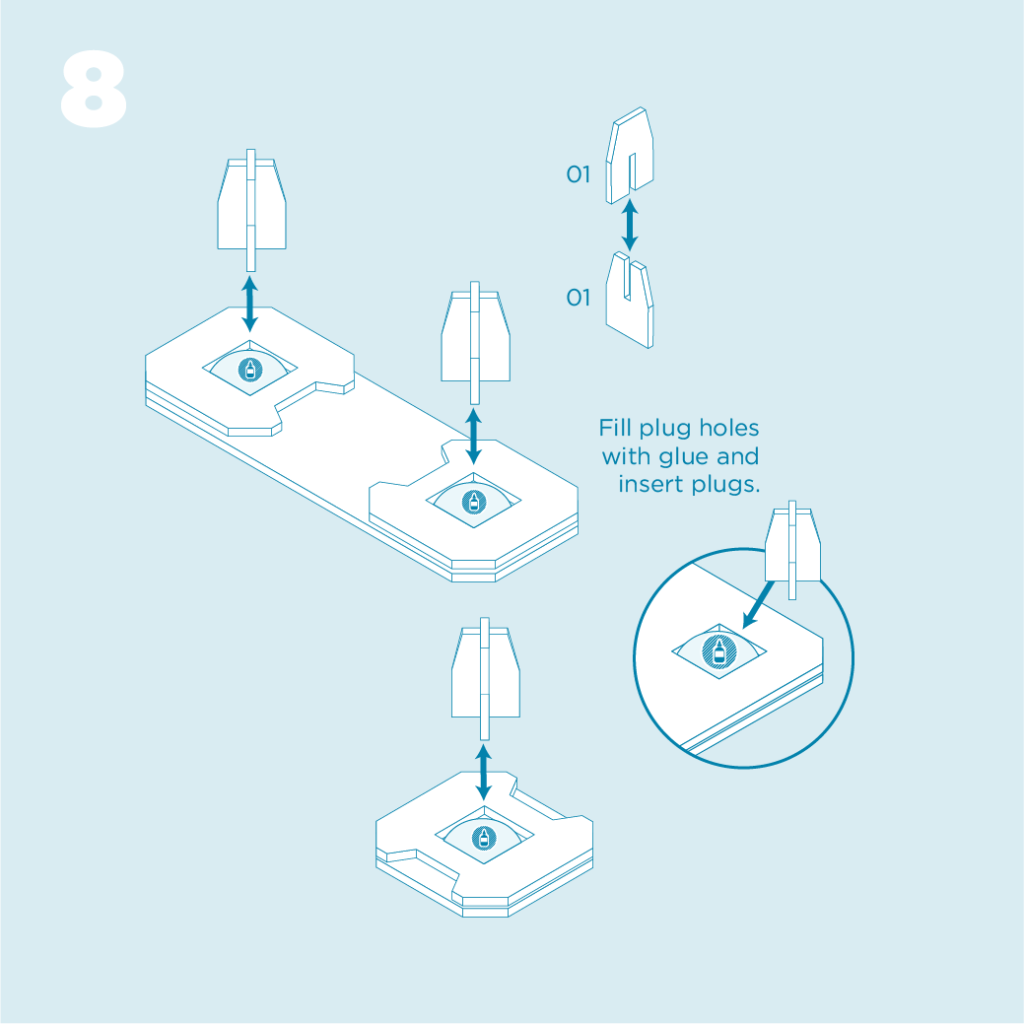
- Please see TIPS & TRICKS video for the most effective method of gluing the plugs.

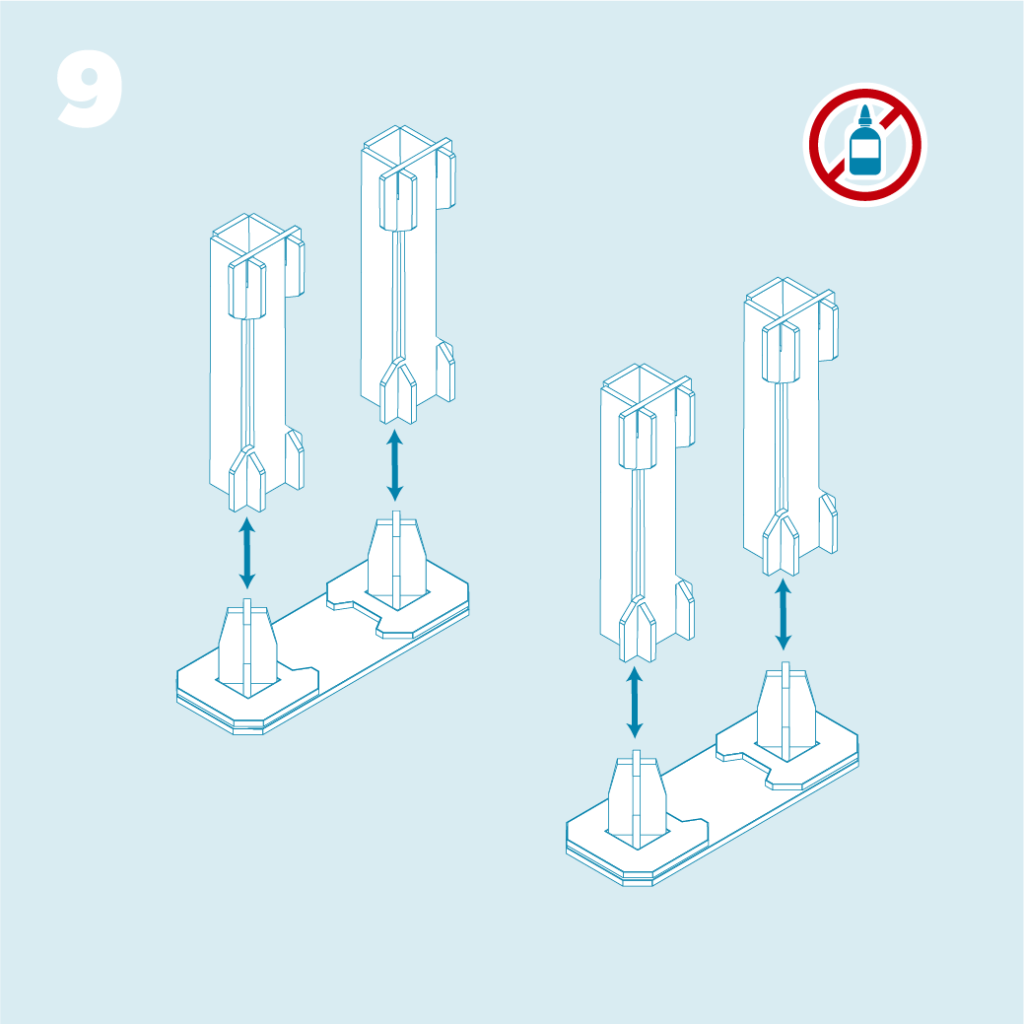
- No glue is required.
- Legs assemble onto feet as indicated.
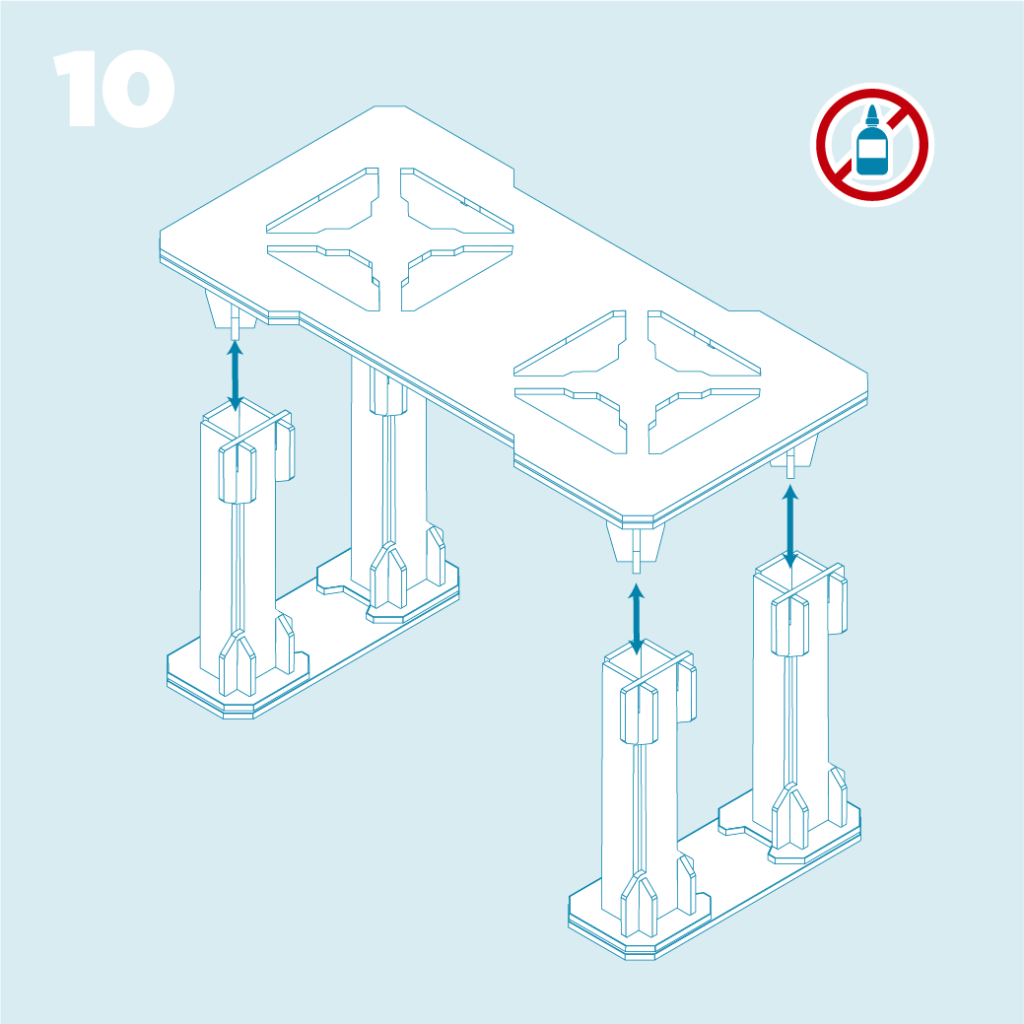
- No glue is required.
- Platforms assemble onto legs & feet as indicated.
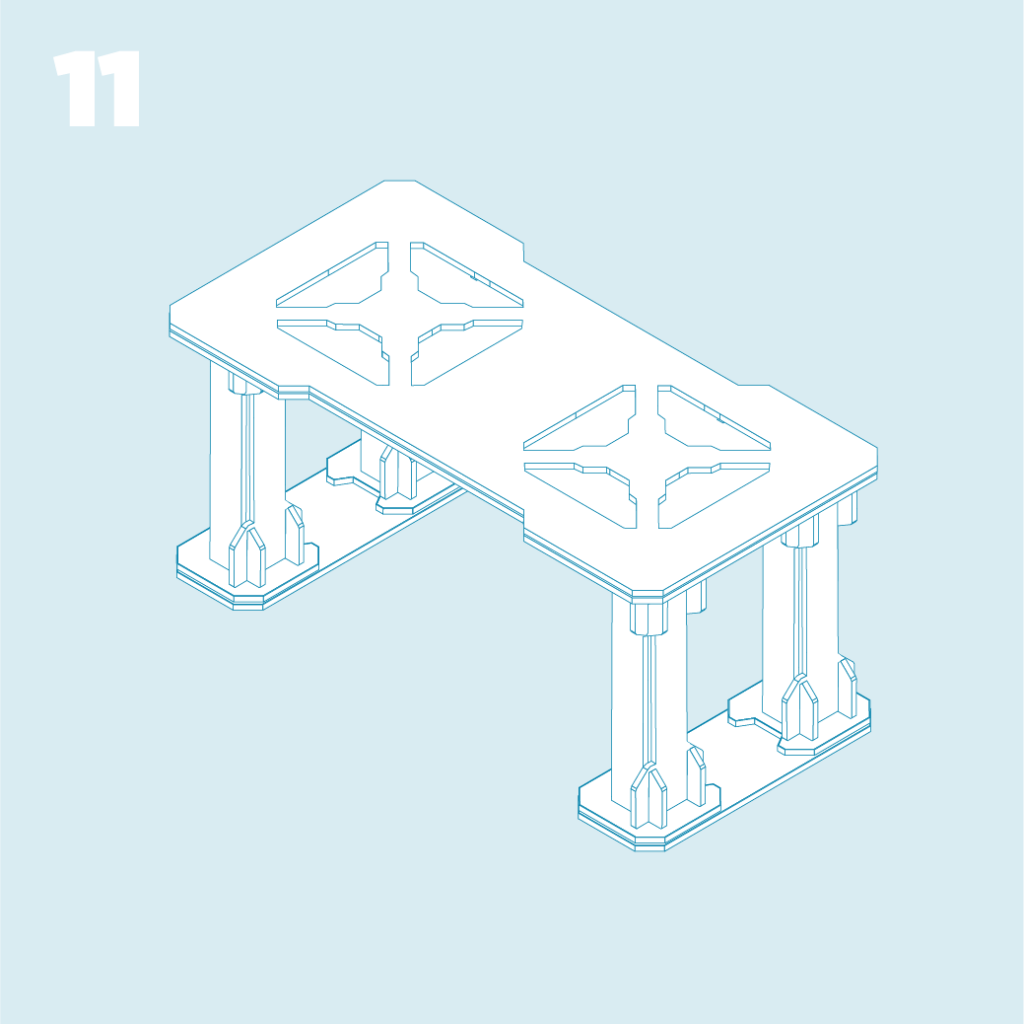
- An assembled platform looks like this diagram.
- The platforms, legs, extenders, and feet can be combined in may ways.
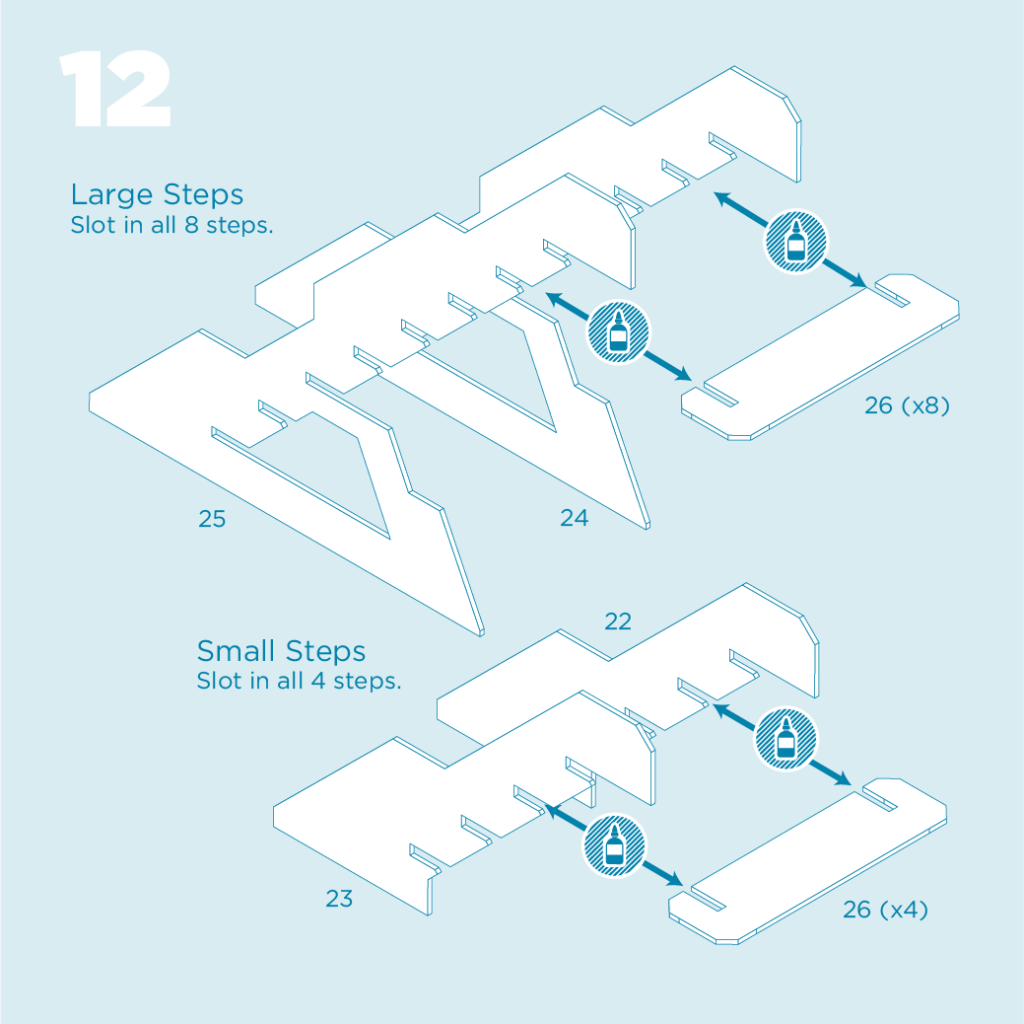
- NOTE – There are 2 extra 26 pieces in the set. That is expected.
- When assembling steps pieces put glue dots in the end of the slots on the side riser pieces before sliding on the smaller tread pieces.
- Ensure steps side risers are straight up and down before allowing to dry.


